
Disclosure: Meeple Mountain received a free copy of this product in exchange for an honest, unbiased review. This review is not intended to be an endorsement.
For 24 years now I have followed the exploits of the Nephalem in their eternal struggle to protect their realm from the forces of hell. For 24 years now I have watched their futile efforts as they try to lock Diablo away only to have him escape time and time again. For 24 years now I have used keyboard and mouse to battle the forces of evil and chaos. 24 years.
I guess you could say that I am a fan.
From my very first experience with the Diablo franchise I knew that I wanted even more. The relentless grind for better gear, the ruthless hacking and slashing as I wade through armies of evil, inventing and testing out new builds… it all speaks to me. I feel compelled to do better and be better. No matter how amazing my character might be, it can always be more powerful. It’s that motivation that has kept me coming back for more all of these years.
So, when I heard about Sanctum, I was immediately intrigued. Sanctum promises a roguelike hack-and-slash demon-slaying adventure video game, in the same vein as Diablo, distilled into an analog format. Does it deliver? Let’s see…
Overview
In the game of Sanctum the players take on the roles of adventurers on a quest to defeat the Demon Lord. As they travel across the land they will encounter demons which they will need to destroy. Each demon that they slay will give them access to powerful items which they will be able to equip themselves with, as well as reward them with experience which can be used to improve their chosen avatar’s stats and allow them to unlock special spells and abilities.
In time, the players will finally face the Demon Lord in an epic showdown. The fight is hard-won and not every adventurer is guaranteed to survive. In fact, they all might perish. If this comes to pass, the Demon Lord wins and his vile corruption spreads across the globe unabated. If he is defeated, the player who performed the best becomes the victor.
This is a very high-level overview of the game. If you’d like to know how to play the game, click on the bar below.
Setup
There are a lot of little nitty gritty details that come into play during the setup of a game of Sanctum. To avoid getting too far into the weeds and making your eyes glaze over, I’m going to show you what a game looks like when it’s been set up with some bullet points and descriptions of the different areas. Trust me, we’ll get into more detail about the different things later, but it helps to know what each area of the game is called and its general purpose.
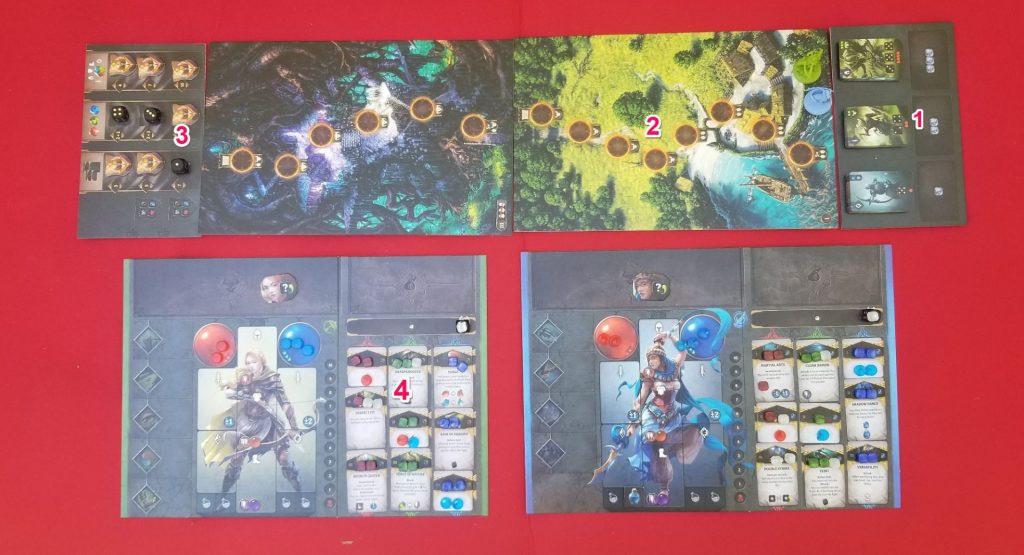
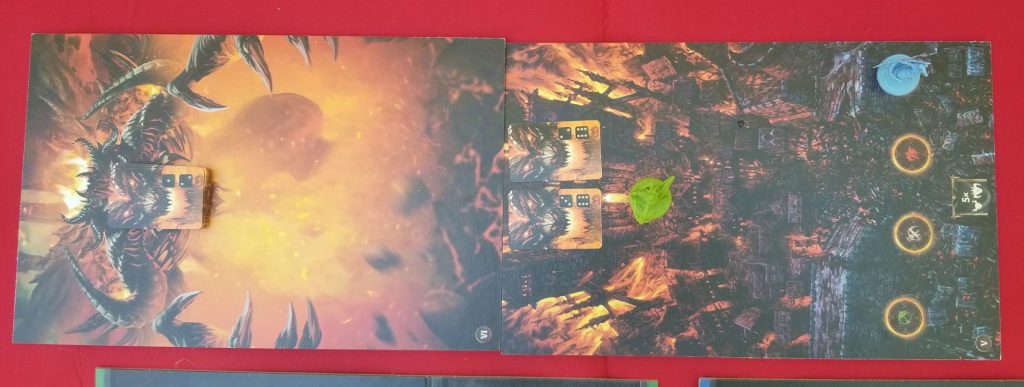
- The Hordes board: This is where the Demon decks live. Each deck is separated by difficulty level. This is represented by the white gems beneath each of the decks. The single gem deck is the easiest while the triple gem represents a greater challenge.
- The Act boards: The player count determines how many and which of these will come into play each game. The Act boards are the boards the players’ avatars will be travelling across and essentially act as the game timer.
- The Achievement board: This board is seeded with several random Achievement tokens. Once collected, these tokens provide the players that use them with one-time benefits such as stamina boosts or dice manipulation. We’ll discuss what that means and how Achievement tokens are acquired later.
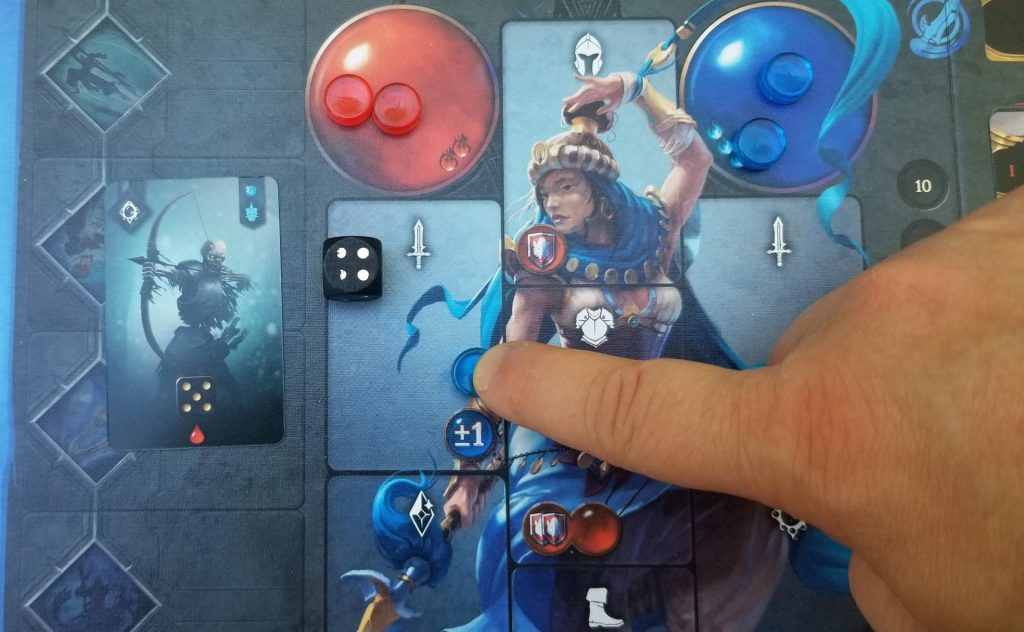
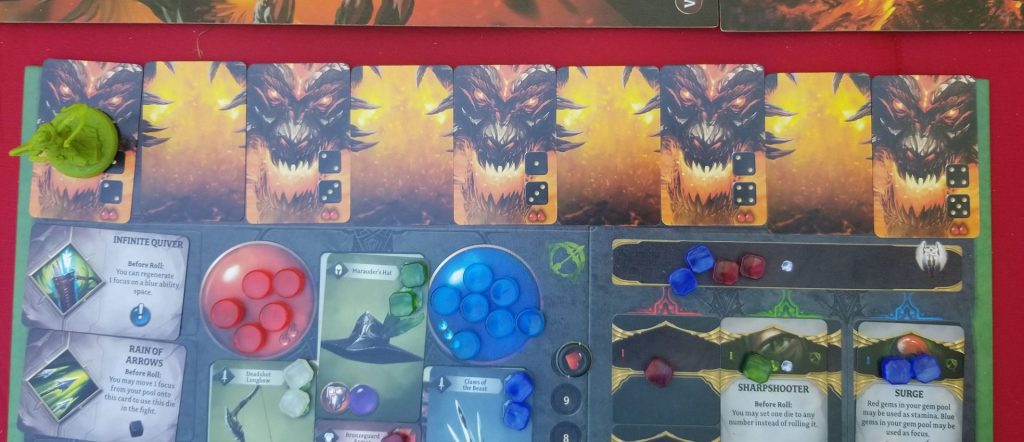
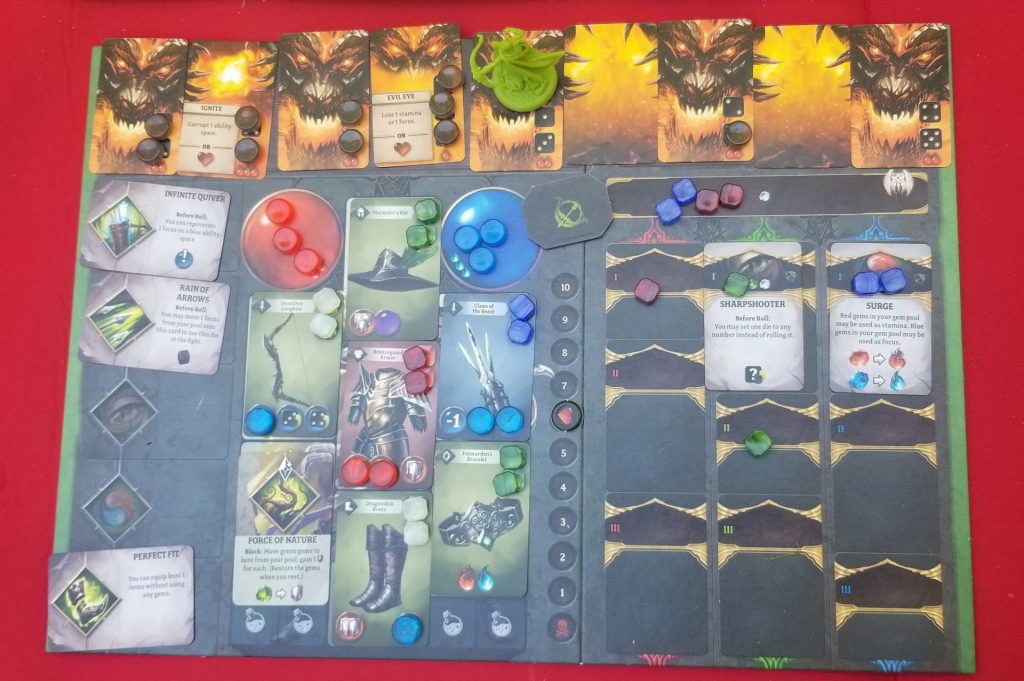
- The Player boards: There are four of these, each for one of the four unique classes. Central to the boards are the character illustrations where items will be equipped. These are bordered by spaces for acquired skills, demon cards, and loot as well as the unlearned skills area.
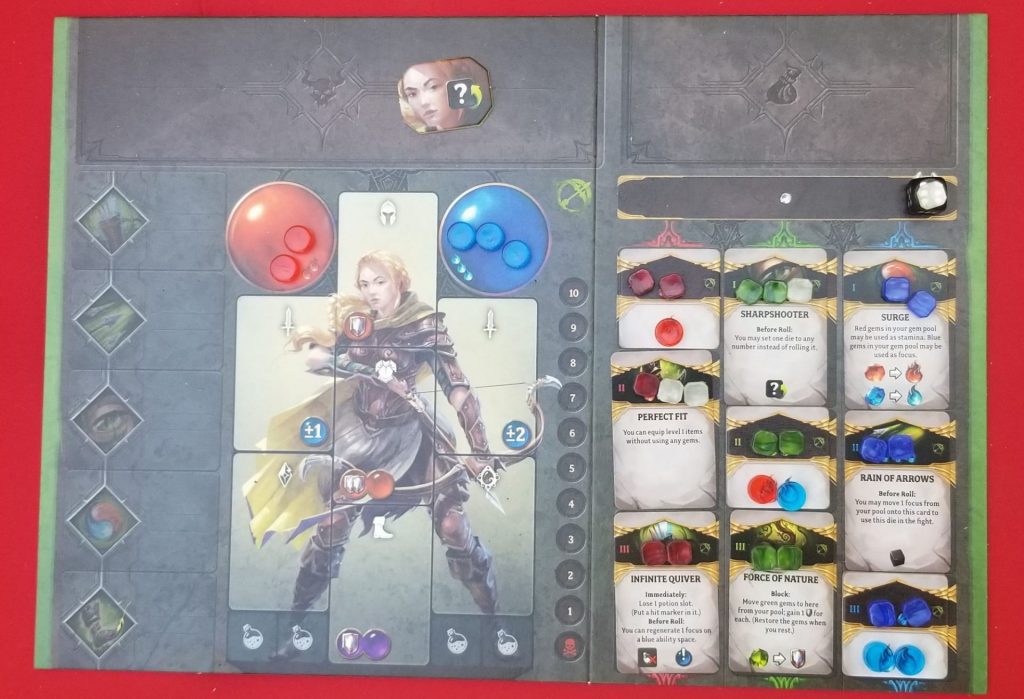
First the players will select a character to play and gain the appropriate player board, figurine, rage tiles, and skill tiles. They will also receive a few stamina and focus tokens according to their character class, three dice, one white gem, and a health counter. The skill tiles are placed on top of the appropriate spaces and each tile is seeded with a number of blue, green, red, and/or white gems (specified on the tile). The player board will look something like this:
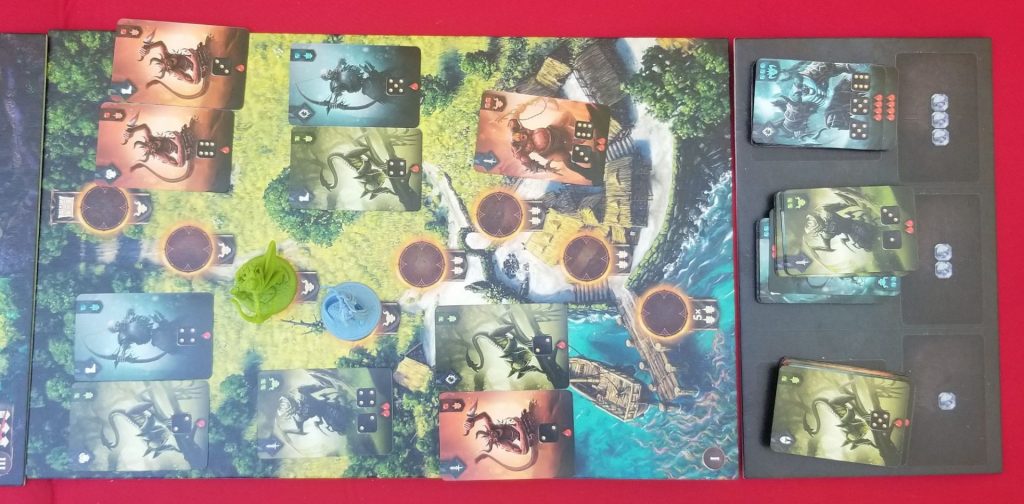
Next the first two Act boards are set end to end sandwiched between the Hordes board and the Achievement board. The specific Act boards that are set out will vary according to the player count as not all boards will be used at lower player counts. There will always be at least one Act board in play that will have a Divine Intervention token placed on it. We’ll discuss the function of this token later on.
Then set up the Hordes board by dividing the demon cards into 3 different decks according to the icon in the upper right corner of the non-item side. These 3 decks are shuffled and placed demon side up onto their appropriate locations. Then the Achievement tokens are shuffled face down and a number of them are randomly placed onto the Achievement board. Not all of them will be used and the unused ones are returned to the box. Finally, a starting player is selected, each player receives a starting bonus based on their position in the turn order, and you are ready to begin.
On your turn you have 3 options to choose from: Move, Fight, or Rest.
Movement
The Move action is composed of several steps: Advance, Reveal Demons, Take Demons, and a possible Treasure Chest.
Advance: Pick up your figurine and move it to the front of the line. If this would cause it to move onto a new Act board, then the oldest Act board is discarded, the current one is moved down, and a new Act board is inserted. This may trigger the end game depending on how far along you are (more on this later). If your movement should land you on one of the Divine Intervention token spaces, then the token is removed and every player receives one additional die to add to their dice pool.
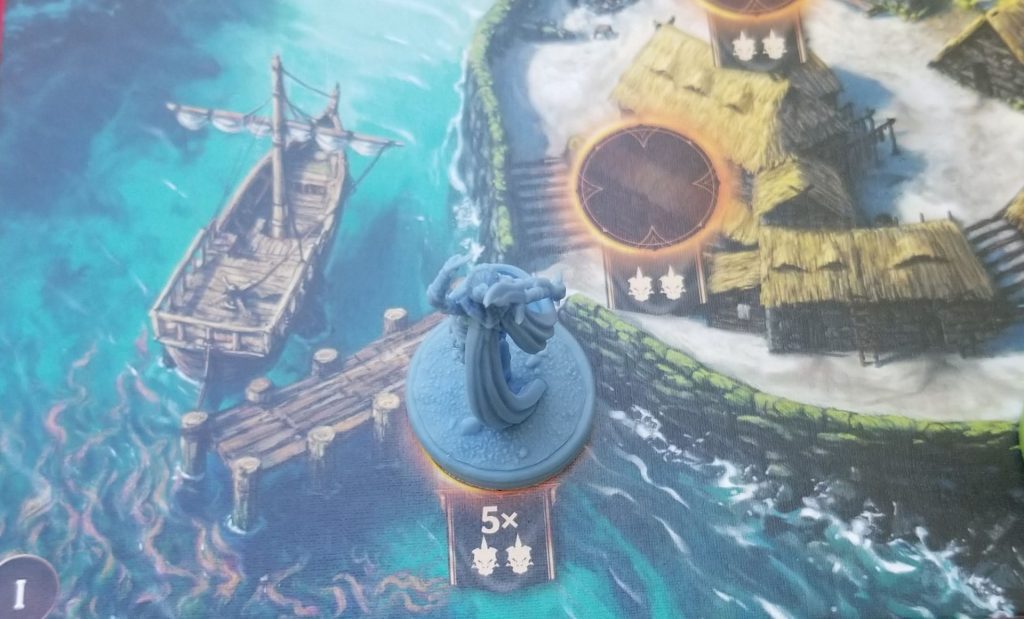
Reveal Demons: The space that you move onto will have icons associated with it that will tell you how many sets of demons will be revealed and what each set is made up of. For instance, the first space on the board tells you to deal out 5 sets of demons: 5 pairs of level 1 demons.
Take Demons: At the end of your movement you must choose one of the available sets of demons to take off of the board and place into the demons area of your player board. You can have any number of demons stored here, but you don’t want there to be too many because a.) you’re eventually going to have to fight them and any that you cannot defeat will attack you and b.) defeating demons is how you obtain experience and better gear.
Treasure Chest: If a player‘s movement ends on the last space of the Act Board then after they have completed the Take Demons step, all of the remaining demons are flipped to their loot side and the players take turns choosing an item to keep before discarding any unchosen remainders.
Fighting
Like Movement, the Fighting action is composed of several steps: Before Roll, Roll, Attack, Block, Gain Levels/Items, and Check Achievements.
Before Roll: If you have any potions you’d like to use, now would be the time to use them. Potions are used to restore stamina (red) or focus (blue) at a 1:1 rate. One potion quaffed = one stamina/focus restored.
Roll: Roll all of the dice that you have. You’ll begin the game with just 2 but will gain more as the game progresses.
Attack: At the bottom of each demon card are dice icons showing a specific pip value. Your goal is to place dice onto each of these with values matching the values depicted on the demon cards. If all of the values on the demon card are covered up, then you have successfully vanquished the demon.
Key to being successful during your attack is using your character’s inherent skills and abilities (as well as the skills/abilities gained from your items) to manipulate the dice in your favor by adjusting the pip values. Each skill will cost some amount of stamina or focus to use. This expenditure is marked by taking the appropriate gems from your stamina/focus pools and placing them on top of the skills being used. Once a skill has been used, it cannot be used again until these gems are removed.
Each player began the game with at least one Rage token (the Slayer begins the game with 2). This token can be flipped to its inactive side to allow a player to change one single die to any value of their choice. It can be flipped back to its active side either through the use of skills or by having unused dice left over at the end of the player’s turn.
Block: Any demons that were not vanquished during the Attack step will counterattack for an amount of damage equal to the number of icons shown at the bottom of their cards. You will begin the game with 10 health, but if this is ever reduced to zero, you will be eliminated from the game. Blocking these attacks is critical.
Any skill or ability that has a shield on it is a blocking ability. Covering up this skill/ability blocks an amount of damage equal to the number of shields shown. At the end of this phase any unblocked damage results in the loss of health at a rate of 1:1.
It is worth noting here that any damage that a demon DID take is not lost. The die is removed and a damage counter is left in its place.
Gain Levels/Items: If you kill any demons on your turn, you will gain levels equal to the icon printed in the top right corner of the card. Gaining experience allows you to move gems off of your character skills in order to gain access to them. These gems are also used to equip items which will be discussed shortly.
For instance, if there are 2 green gems showing, then you will gain 2 green experience. This will allow you to shift up 2 green gems or 1 green and 1 white gem (white gems can be treated as any color). If any character skill has every gem removed from it, then you gain access to that skill. This means that shifting gems up from the higher level skills can make the skills above them more difficult to acquire because you’ll be adding extra gems to those cards. Once a gem is shifted off of the board completely it becomes available for use.

After gaining experience, the demon card is flipped to its opposite side to reveal the loot that was dropped. On the front side of the demon card is an icon depicting what type of loot will drop (a helmet, for instance) but nothing else about its stats. These loot cards are moved into the loot area of your player board and can be equipped later.
Check Achievements: If a person is the first to obtain one of the Achievement goals (be the first to gain a certain number of skills, for example) then they will collect the Achievement token from the Achievement board for having done so. Turning these over reveals a blessing that will come in the form of a one-time bonus: free stamina/focus (for use during the final battle with the Demon Lord only), dice manipulation, or extra defense.
Resting
The Resting action is broken down into 4 steps: Restore, Equip Items, Buy Potions, Check Achievements. I’m not going to discuss Check Achievements since we’ve already gone over it.
Restore: Move all of the stamina and focus gems from wherever they’ve been used back to their appropriate spots on the Player board.
Equip Items: Each item has a number of gems printed on it. In order to equip the item, you would first place the item into its appropriate slot and then place the matching gems on top of the icons printed on the card. You can freely swap items in and out of slots during this step as long as the items that are equipped at the end of the step all have matching gems on top of them.
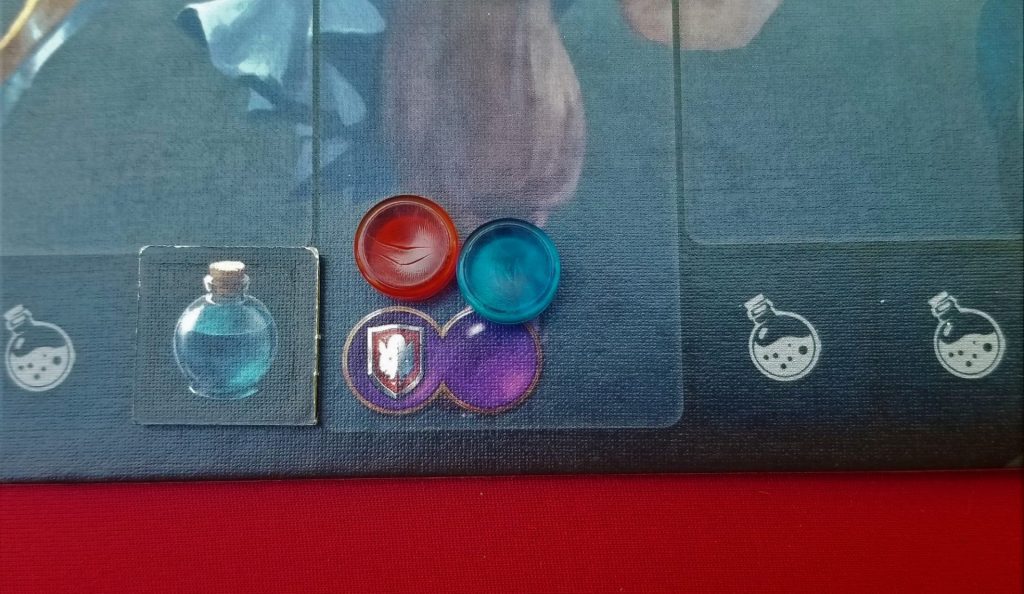
Buy Potions: You can discard items (equipped or unequipped) to purchase a potion; stamina or focus, your choice. You only have a limited number of potion slots, though, so choose wisely.
The Beginning of the End
The end game is triggered once a player reaches the Act V board – the Walls of Sanctum. The first player to reach the board deals out 5 pairs of demons as indicated and then each player receives one extra die. Once a player arrives on this board they can move no further until at least 1 person has defeated all of the demon cards on their player board. Once any of the players begin their turns with no demons they will have the opportunity to either rest or breach the walls.
If the player chooses to breach the walls, the Demon Lord appears. The Achievement board is removed and the Act VI board is introduced along with two face down cards from the Demon Lord deck. The remaining players will then have the opportunity to join the fight, discarding any remaining demons on their board, or to continue fighting. The longer it takes for a player to join the fight, the more Demon Lord cards they’re going to be affected by in the long run, so there are pros and cons to weigh when joining the fight at a later time: being better prepared versus bearing the brunt of even more negative effects than you would have if you’d joined earlier. Eventually, though, the game will force you to join the fight. Once every player has joined the fight a final rest is performed by each character.
Facing the Demon Lord
Before the final battle begins, the players will flip over the Demon Lord cards one by one and resolve each in order. Demon Lord cards are double-sided. On one side of the card is an image of the Demon Lord with a couple of die faces and icons showing that represent the amount of damage that the card can inflict. On the other side is some detrimental effect. These effects will be revealed as the card is flipped, but not every player will be affected by all of them (as stated earlier). Once this initial salvo of Demon Lord cards has been resolved, the final battle begins.
When the final battle begins, each player is dealt 5 random Demon Lord cards and 4 random Fury cards. These are arranged along the top of each player’s board in an alternating pattern beginning with a Demon Lord card. The Demon Lord cards are placed with the dice side face up and the Fury cards are placed with the text side face down. Then each player places their figurine on top of the first Demon Lord card. These 9 cards are the last challenges to overcome before a player can finish the game.
The end battle is divided into rounds, each consisting of a Fight action, which players perform simultaneously. Each player uses potions, rolls their dice, and then assigns damage to any cards in their Demon Lord tableau that have visible die icons. Then the Demon Lord counterattacks for an amount of damage equal to the number of visible damage icons. Players can exhaust their skills and equipment to assist them in their attack and defense endeavors but should bear in mind that there are no longer any Rest actions performed.
When the Demon Lord card the player is standing on is defeated, they will flip the next Fury card in line to its other side and move their figurine onto it. There will be an immediate effect that occurs (usually in the form of choosing between 2 negative outcomes). These cards also feature die icons and damage icons. In order to progress to the next card in line, this card must be defeated first. This progression from one defeated card to the next undefeated card continues, round after round, until the player has either perished or defeated all of the cards in their lineup.
But, just in case you thought things were going to be easy, after each Fight action, the Demon Lord roars. Two Demon Lord cards are dealt along the bottom row and then flipped over one at a time and their negative effects are applied. Each time a Fight action is completed, one less Demon Lord card than before is dealt out and the effects are applied. The difficulty rating can be adjusted by initially dealing out more than two Demon Lord cards. Once a player has defeated their last card, they are no longer affected by any of these negative effects.
If only one player is alive at the end of the game, they are the victor. If multiple people survived, the player who has the most health left wins the game.
Thoughts
Being a massive Diablo nerd, Sanctum excited me. The artwork, the concept, and the overall aesthetic make the comparison undeniable. A massive evil monster that needs to be destroyed? Check. Countless minions that need to be dealt with along the way? Check. Gearing up as I go? Check. Unlocking new skills and tweaking my build along the way? Check. Sanctum had all the hallmarks of an analog Diablo clone, but would it… could it… live up to the hype I’d built up in my head? Having been burned by cardboard video games in the past, I went into my first game of Sanctum with tempered expectations.
Sanctum delivered. It delivered hardcore.
Sanctum lures you in very subtly. “Here,” it says. “Take these easy rules—move, select some demons, and fight them.” So you move your figurine, flip over a few cards, and then you realize that you’re already faced with a tough decision. The demons that you choose to take not only determine how much and what kind of experience you’ll be receiving when they are defeated, but they also have icons on them showing which type of loot they’ll be dropping. Do you go for the easiest demons that reward the same color experience even though they’re both going to drop boots or do you go for the tougher, mixed pair because one drops gloves and one drops a helmet? Or do you go for the biggest baddie on the board because he rewards the most experience even though it means you’ll only be getting one piece of loot?
And this is all before you’ve even fought your first demon. After having to decide how best to manipulate your skills and equipment to achieve victory, you’ll be faced with the decision of how to go about assigning your experience. Moving gems off of the top tier opens up your lower level skills more quickly and frees up those gems so that you can begin equipping your character. However, the higher level skills are generally more powerful, so maybe you should focus on unlocking those first? But doing that means that your mid-tier skills are going to become more difficult to unlock, so maybe the correct answer is to free those up first.
My favorite part is when I get to rest later in the game. My bag will be overflowing with loot and I love being able to min-max my character by trying to find the best way to equip the best items that I possibly can with the gems that I have at my disposal. It’s a lot of fun! And speaking of the loot, flipping over a defeated demon card to reveal the prize on the other side creates a palpable air of excitement as you wait to see what’s been uncovered… even if it isn’t your turn.
It isn’t often that a game like this can make you feel invested in what other people are doing. In most games of this ilk you’re focused on your own agenda and the only time your opponent’s actions matter are when they have a direct effect on you. But Sanctum is different somehow. Maybe it’s because you’re all trying to achieve the same goal: face and defeat the Demon Lord and save the world. Maybe it’s just that almost everything about this game is so freaking cool that it’s hard not to feel invested. Regardless, it works. Flipping over a loot card in Sanctum fills me with the same anticipatory thrill that I get when I’m identifying an item in Diablo, except in Sanctum I know that my piece of loot isn’t going to suck.
Notice I said “almost everything”, though. Not everything about Sanctum blew me away. For starters, one of the miniatures in my copy was damaged when I received it and the axe had sheared off. It’s a pretty small thing, but it was still a little disheartening nonetheless. But the bigger issue I had was with the end game. It’s SO HARD. There’s a difference between something being difficult and something being so insanely difficult that it’s almost not any fun anymore. The end game of Sanctum, sadly, favors the latter more so than the former. Why anyone would choose to include even more Demon Lord cards is unfathomable. Better them than me.
Then there’s the issue of player elimination. Unless you’re really, really bad at this game, you’re going to make it to the final battle, but you may not make it through more than a round or two of the end game. Even though you’re in control of your own destiny most of the time, bad dice rolls or a casual mistake can sink you. Completing the game with everything exhausted and just a small shred of health left feels awesome unless you’re one of the people that died. Having to sit there and watch everyone else finish the game is okay at first. You’re still invested in seeing if anyone is able to pull off a victory. But as fight after fight occurs, it can begin to wear on you. Figuring out a way to stay involved — reading off the Fury card text dramatically, beginning to put the game away, cheering on your friends, etc. — is the key to making it through this difficult time.
And that’s it for my negative feedback. All in all, Sanctum has been a wild ride and I have enjoyed it immensely. I highly recommend it. Especially if you love Diablo as much as I do.


Your love certainly comes through. Thanks for a great review!