
Welcome to the World of Woodcraft, a fantasy realm where hordes of reprobates clash with an alliance of heroes in a never ending battle for supremacy over the continent of…
What’s that? It’s just Woodcraft?
Wow. Was I ever off the mark! Let’s begin again, shall we?
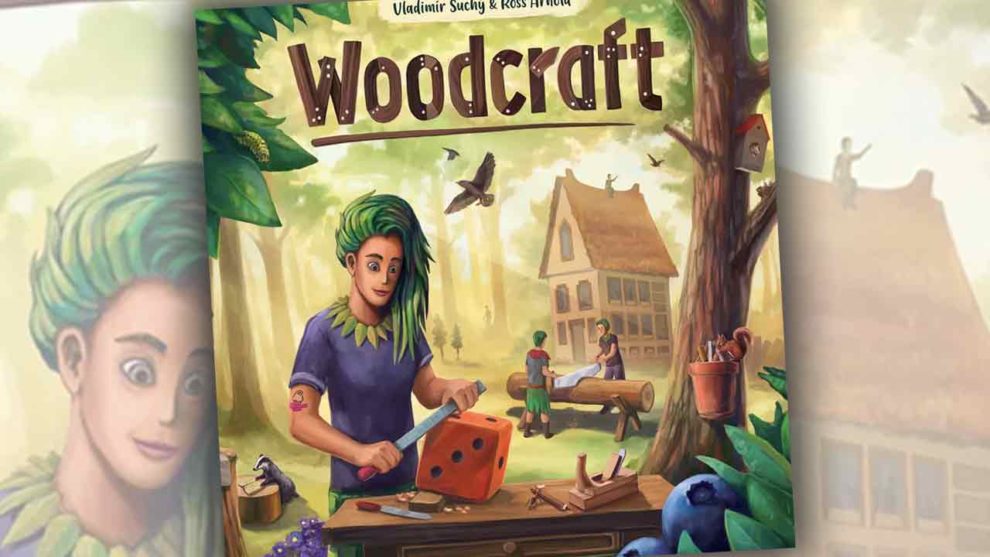
Welcome to Woodcraft, a fantasy realm where two to four forest dwellers compete to construct the best wooden constructs. In Woodcraft—Vladimír Suchý (Underwater Cities, Pular 2849)— you’ll be chopping, gluing, nailing, and mashing together different pieces of wood to fulfill your clients’ requests. The bits of wood are represented by dice, of which there are three colors: green, yellow, and brown. After obtaining the dice, you’ll manipulate them using the tools in your workshop until you’ve got the components needed to fulfill your orders. Got a contract that requires a couple of green 1s? Well, how about you cut that green 6 into smaller pieces? You’ll need a saw for that. And if you desire to cut up even more dice, then you’ll need to expand your shop by adding even more saws to it. Heck, you can even hire some helpers to assist you along the way.
In Woodcraft, virtually everything is worth hazelnuts–er, victory points. So, it comes as no shock to learn that the object of the game is to be the person with the most hazelnuts when the game comes to an end. Of course, this is a very high level overview of the game. If you’ve heard enough and just want to know what I think, feel free to skip ahead to the Thoughts section. Otherwise, read on as we learn how to play Woodcraft.
Setup
A game of Woodcraft is set up thusly:
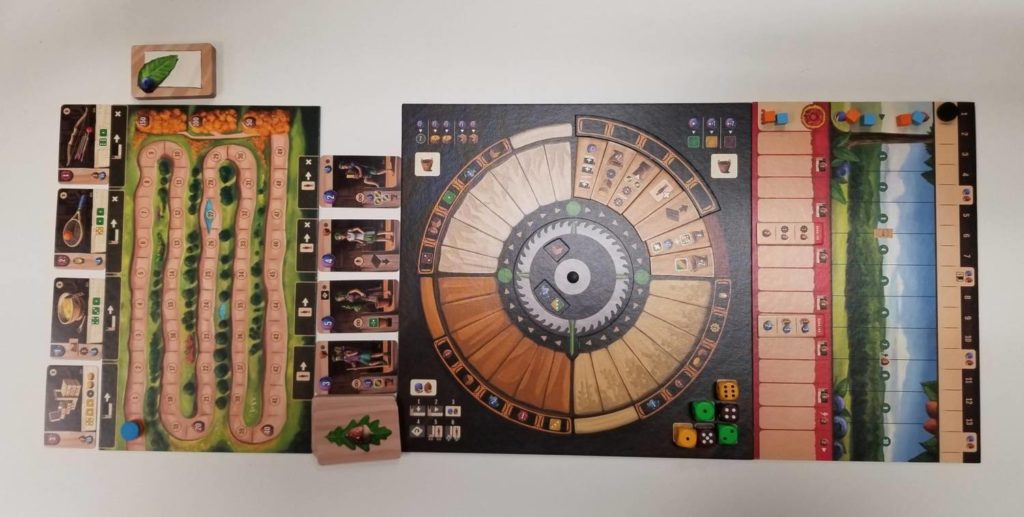
Place the Action Wheel, Scoring, and Income boards onto the table. Arrange the Action Wheel so that the arrow points downward to the 6 o’clock position. Place the arc tile over the bonuses in the top right quadrant. Then shuffle the Action tiles and place them into the appropriate spaces of this quadrant. Once that’s been done, roll two dice of each color and place them onto the market spots at the bottom right of the board.
Gather up the various decks of cards and shuffle each deck separately. Deal four early game Order cards (marked with a single blueberry on the back) into the Order card slots along the edge of the Scoring board. Place the remainders off to the side along with the deck of late game Order cards (two blueberries). Now, deal four early game Helper cards (single acorns) into the Helper card slots along the other edge of the board. Place the remainders off to the side along with the deck of late game Helper cards (two acorns). Randomly place out Public Contracts equal to the number of players plus one, returning the extras to the box.
Next, randomly select two of the three Reputation Track tiles and place them, face up, onto the Reputation track of the Income board in the appropriate spots for the number of players. The remaining tile can be left in the box. The Round counter is placed onto the 1 space on the Round track at the top of the board. And with that, all that’s left is the setup for the Player Boards.
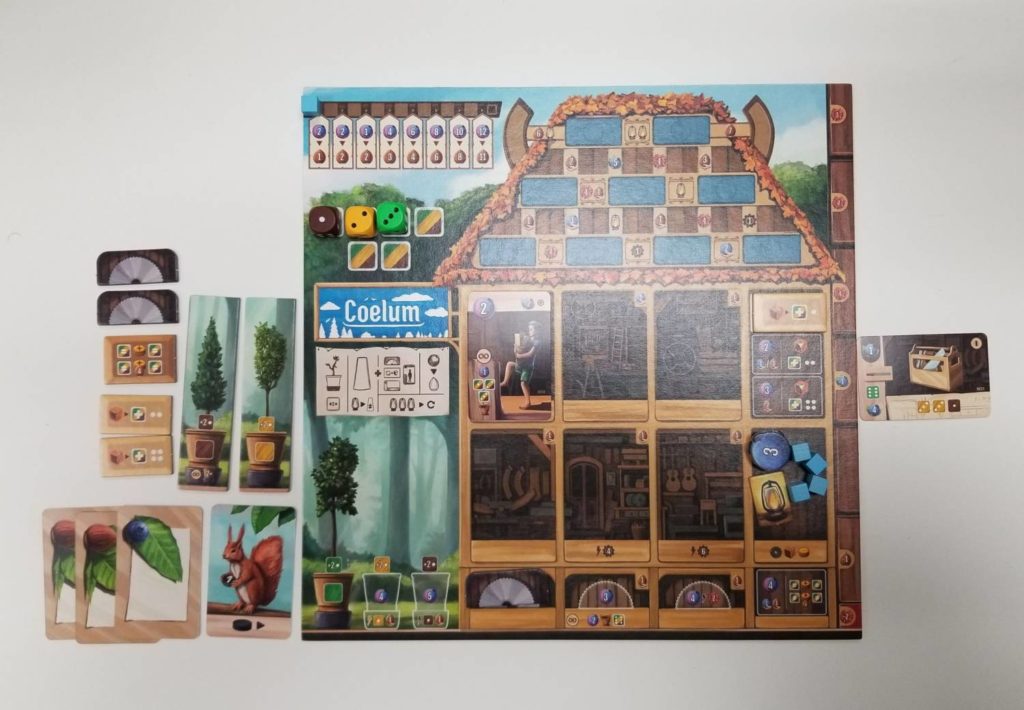
Give a Player board to each player along with: the cubes and discs matching their selected color; three Sawing tiles; one of each kind of Splicing tile; a single yellow Pot; a single brown Pot; a Gluing tile; a green, yellow, and brown die (set to 1/2/3 respectively); one Lantern tile; and twelve blueberries. Each player places one of their cubes onto the Hazelnut, Blueberry, and Reputation tracks of the Income board. Their disc is placed onto the zero of the track on the Scoring board. The players all begin with one Sawing tile on their Player board as well as the first of the Splicing tiles.
Then each player receives two Hazelnut Order cards, five early game Order cards, and three early game Helper cards. From these, they will choose two of the Order cards and one Helper card to keep, discarding the others. The Helper card must immediately be hired (by paying its blueberry cost) and placed into the player’s workshop on their Player board. From the four Order cards in their hand, each player selects one and places it into the Order row next to the icon matching the icon on the top left of the card.
Place the remaining bits—the Blueberries, tokens (Lantern, Sawblade, Glue, Scrap, Reuse, and Tools), and dice—off to the side to create a supply.
Finally, a start player is selected by some means and given the Starting Player card. Now, you’re ready to begin playing Woodcraft.
Navigating the Action Wheel
On a player’s turn, they’ll first grow any trees that may be planted in their pots (more on this later) and then perform one of the actions from the Action Wheel, along with any of the various free actions they want to perform. All these actions can be performed in any order of the player’s choosing, and as often as they wish, excepting the Action Wheel action which can only be performed once.
Once they’ve finished performing all of the actions they wish to perform, a player has the option to spend blueberries to move up one space of the Marketing track on their Player board. The blueberry cost and victory points earned for doing so vary from one movement to the next. Then the player must discard down to six dice in their Lumber Pile on their Player board.
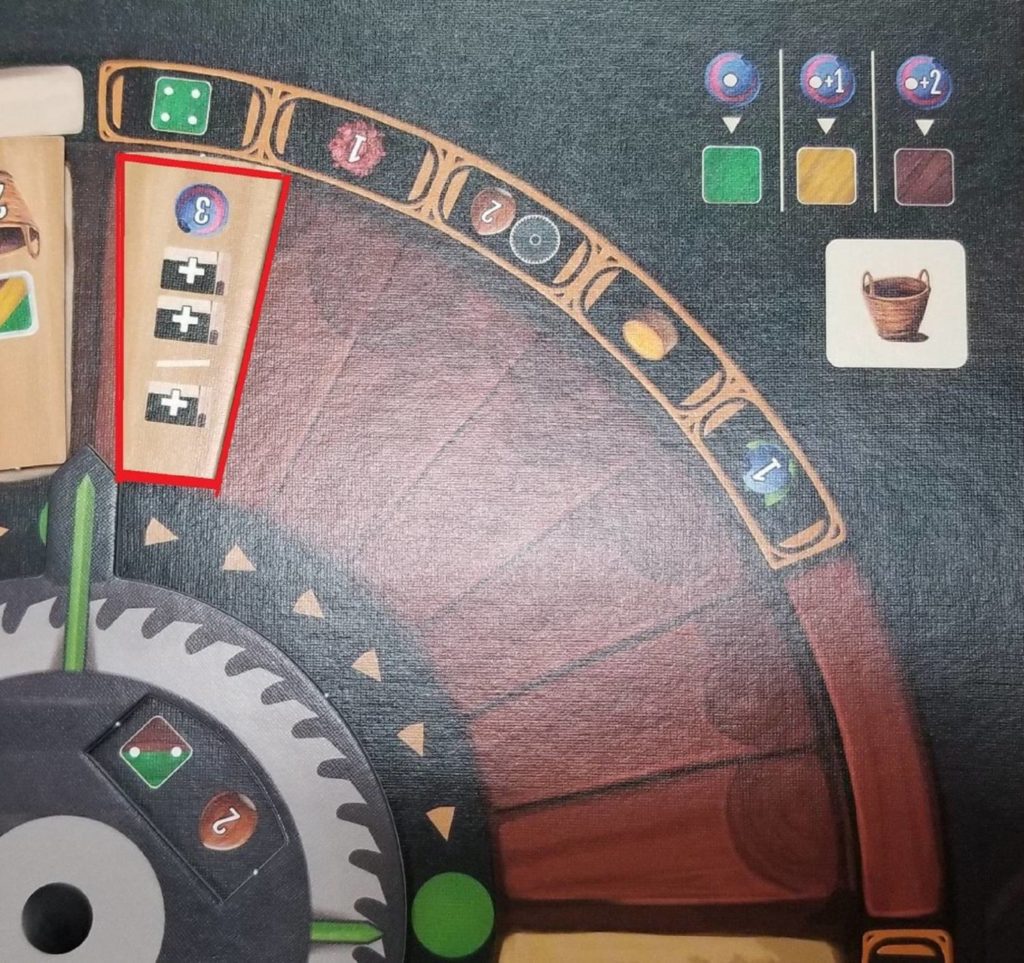
When selecting an action from the Action Wheel, you’ll pick up the tile, earn any bonuses from the quadrant it’s being moved from, and then slide it into the first empty space of the next quadrant. If moving the tile should cause it to cross over the arrow, then the Action Wheel advances one quadrant. However, the Action Wheel cannot advance into a quadrant that isn’t empty. So, if advancing it would cause that to happen, the player is just going to have to select a different action.
This is always the part of the game’s teach that’s the hardest to explain. It’s a little wonky at first, but quickly becomes second nature. The important takeaway is that the Action Wheel will advance. As it does so, it will uncover bonuses in older quadrants which makes actions that are maybe not-so-popular more attractive. And to double down on this attractiveness, there’s even a mechanism in place that allows you to trade two Lantern tiles into the supply so that you can pretend the Action tile is actually some other Action tile. Once the Action Wheel has made a complete rotation, the Arc tile set out during setup is removed revealing that quadrant’s bonuses.
A player can choose from the following actions:
Buy Lumber: Spend blueberries to obtain up to two dice from the market supply on the Action Wheel board. Each die costs 1 blueberry per pip. Yellow dice cost an additional blueberry, and brown dice cost two extra.
Exchange Dice: Sell a die for twice its pip value plus its additional value. Selling a brown five, for example, would earn you 12 blueberries—(5*2)+2. Also, you may purchase a value six die from the supply, but it’s got to be a different color from the die you sold, if you sold one.
Buy Materials: Purchase materials from up to two different categories (but only one from each category). Pay their costs and take the materials from the supply. The different categories appear at the top left of the Action Wheel board. They are: Sawblade, Glue, and Scrap tokens.
Choose Orders: Select an Order card from one of the cards on offer and then place it into its appropriate row next to your Player board. Then refill the Order cards. You may then pay 3 blueberries to select and place a second Order card into your Order card rows.

Choose a Helper: Hire a Helper card by paying its blueberry cost. Then, place it into your workshop orthogonally adjacent to a previously placed Helper. If the newly placed Helper covers a Hazelnut or Blueberry track increase icon, then move your cube up on the matching track on the Income board. If the newly placed Helper covers the ‘production x 4’ or ‘production x 6’ icon, then you may produce with four or six of your Helpers respectively.
Produce/Plant a Tree: You may produce with two of your Helpers. Or you may produce with just a single Helper and then plant a tree. To plant a tree, take the value one or two die (cutting a die into two, if needed) from your supply matching the color of the Pot you want to plant it in. Then place the die onto the Pot.
Improve Workshop: pay the blueberry cost associated with upgrading one aspect of your workshop and then add that upgrade tile to it. Gain any bonuses (typically movement along the Hazelnut and/or Blueberry tracks on the Income board) that may be covered. We’ll talk about the various aspects of the workshop improvements when we talk about the free actions.
Helpers and Free Actions
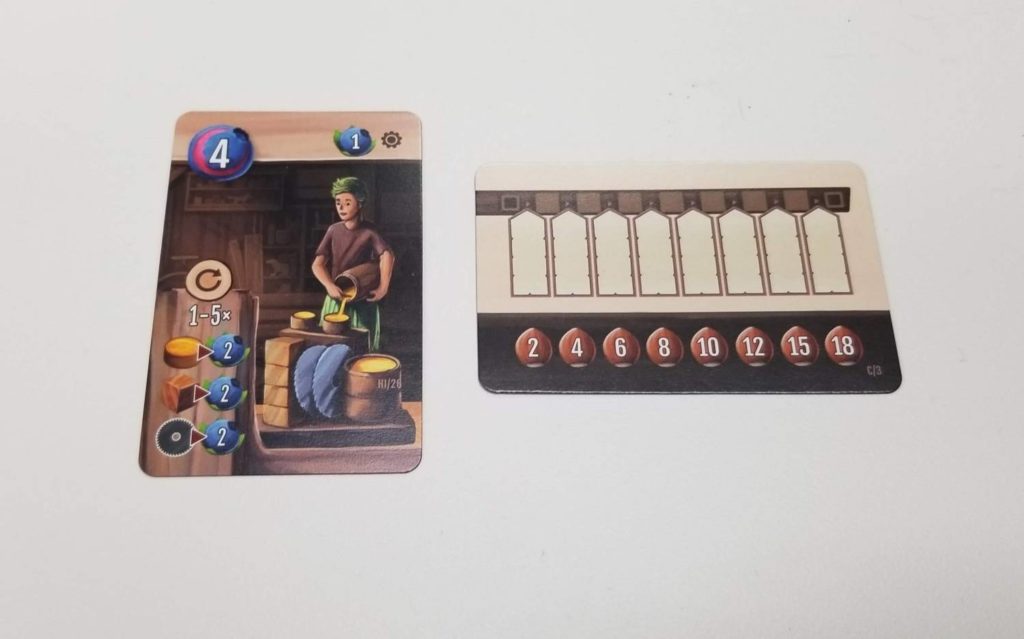
In addition to their blueberry cost, each Helper also provides a Production icon (at the top of the card) as well as some unique ability. Some abilities are immediate “gain something right now” in nature. Others have “once per turn” abilities which allow you to do things such as exchanging resources for different resource types, manipulating dice, or selling resources for blueberries. Still others have ongoing effects that usually change the fundamentals of how the other actions work. For instance, there’s one Helper with an ongoing ability that gives you a 1 blueberry discount when purchasing points using your Marketing track.
The Production icons will gain you whatever’s shown whenever something you do (such as fulfilling certain Order cards or covering the production icons in your workshop) causes them to produce. Some earn you blueberries. Some may earn you dice. Others may earn you things such as Glue or Lantern tokens. There’s a wide variety of them. Thankfully, the game includes a handy appendix sheet which shows the Helpers along with their costs, Production icons, and their abilities.
Using their Helpers’ abilities is just one of the free actions a player has at their disposal. Here are some others.
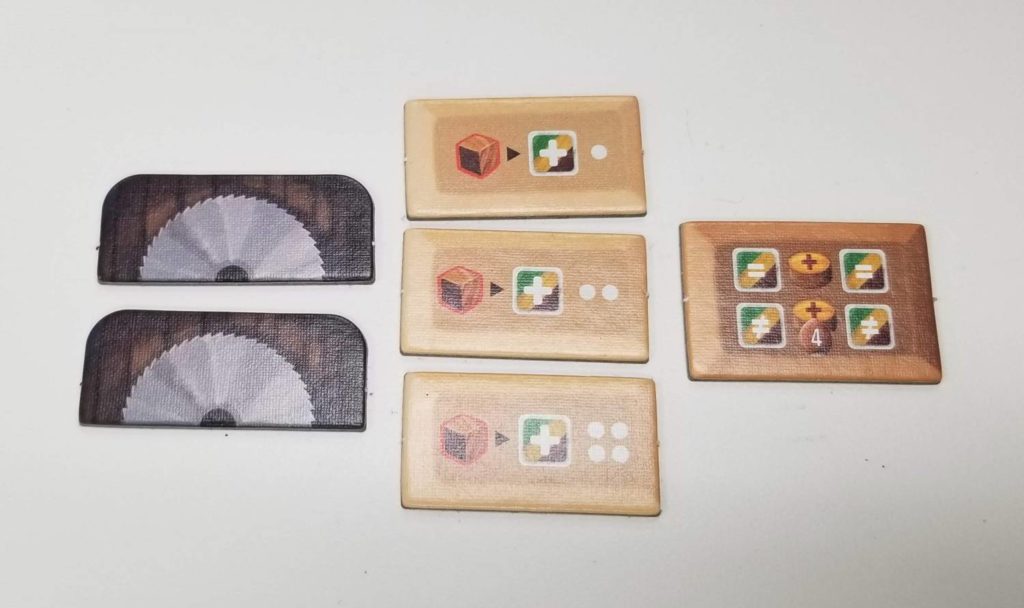
Sawing: by flipping a Sawing tile to its used side, a player may cut a single die into two pieces. Then, they may discard any Sawblade tokens they have to truncate the die even further, one truncation per discarded Sawblade. Turning a value six die into three value twos, for example, would entail flipping a Sawing tile to its used side (splitting into a two and four) and discarding a Sawblade token (splitting the four in half).
Splicing: by flipping a Splicing tile to its used side and discarding a Scrap token, a player may increase the value of one of their dice by a number of pips equal to whatever’s listed on the tile that was used.
Gluing: by flipping their Gluing tile to its used side and discarding a Glue token, a player may squash two dice of different values together (they’re discarded) in order to create a new die with a value equal to the combined pip values of the other two dice. The new die’s color must match one of the discarded die’s colors. If different colored dice were glued together, then the player earns four Hazelnuts in addition to receiving the new die.
Use a Reuse Token: normally, used workshop tokens only refresh during Income phases, but if the player has a Reuse token, they may discard it to refresh a workshop token of their choice immediately.
Harvest a Tree: take the tree from any Pot and add it to your Lumber Pile. The Lumber Pile may contain as many dice as you please, but you’ll lose some if the total number of dice exceeds six at the end of your turn. A value six die must be harvested immediately. Any others can be harvested whenever you feel like harvesting them.
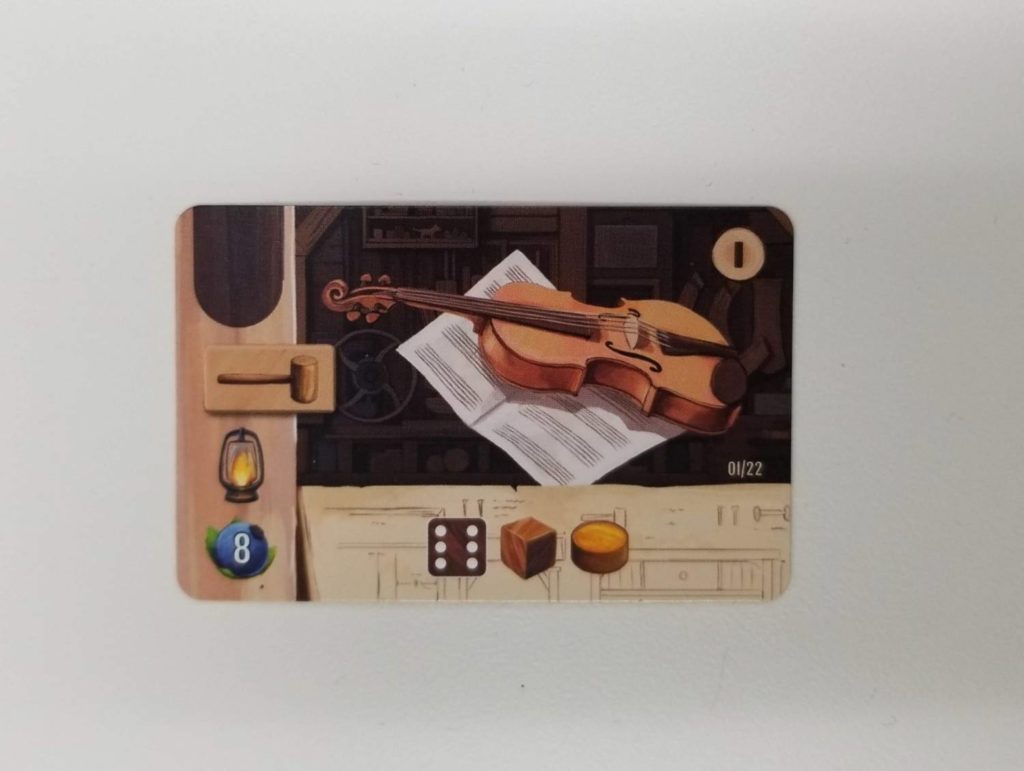
Complete Orders: Each Order card has some criteria running along its bottom which must be fulfilled in order to complete it. Once completed, the player gains the rewards shown on the left hand side of the card and they also earn the reward (or penalty) from whichever row it resides in whenever the Order is completed. Completed orders are set off to the side. They may score their owner points at the end of the game.
The Order cards with the hazelnuts on the back are special. These reward one of two benefits upon their completion: either 5 blueberries and 5 hazelnuts OR the chance to place a cube onto one of the Public Contracts. Once a Public Contract has been claimed, nobody else may claim it unless they are also able to place one of their cubes onto it before the end of the same round.
End of Turn, End of Round, and Income Phases
At the end of a player’s turn, they must discard dice from their Lumber Pile in excess of six. Then, any “once per turn” Helpers refresh and the player may optionally spend blueberries to move up on their Marketing track. This has all been discussed previously, but it bears repeating it here.
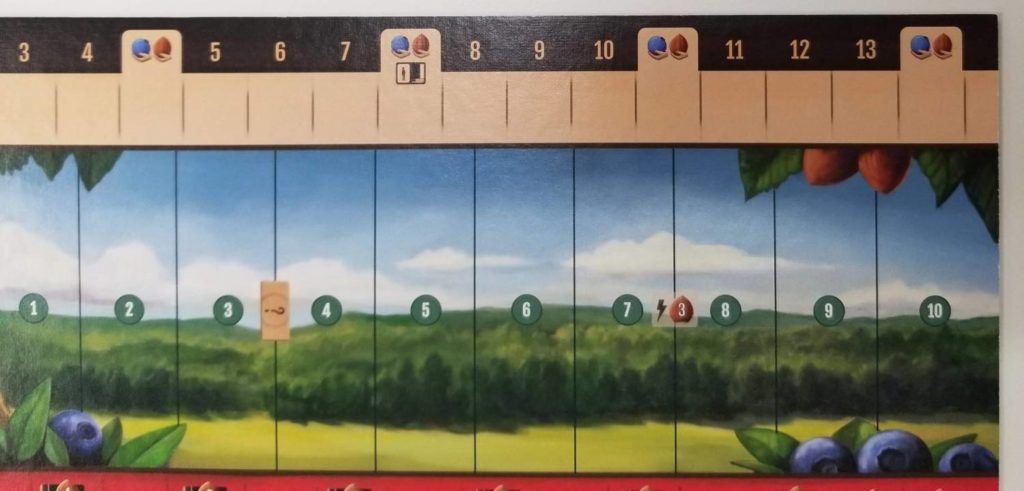
Once every player has had a turn, the round comes to an end. When this happens, the Round counter progresses a space on the Round track. Depending on the round, this may trigger an Income phase.
The Income phase is broken into several steps. First, any Order cards shift down one row on their owner’s Player board. Then, each player must choose one of the Order cards from their hand to put into play. Next, players earn income based on their positions on the Hazelnut and Blueberry tracks. Finally, any used workshop tokens refresh, the two cards at the end of the Order and Helper card rows are discarded, the rows are refilled, and you’re ready to begin the next round. After the second Income phase, the early game Order and Helper cards will be replaced with the late game cards.
And There’s More!
I didn’t even touch on the bonuses earned from placing Tool tiles into your attic or how bonuses are earned by crossing the various lines on the Income tracks or what happens should you reach the end of one of these tracks. But, I think I’ve provided enough information for you to have a good idea of how the game is played. Suffice to say, there’s a lot going on. But don’t fret. It seems a lot more complicated than it really is. After one or two turns, you’ll quickly pick up on the various mechanisms and how they all work.
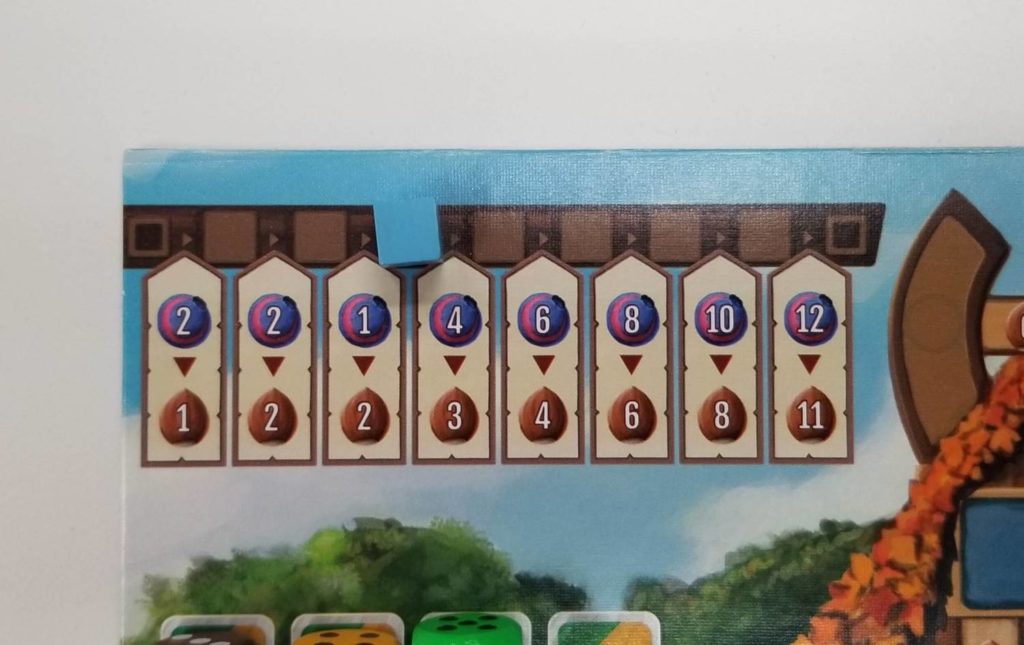
But, there is one more important thing you should know. Any Order cards that fall off of your board, or that have not been fulfilled, are going to cost you two Reputation. And that’s important to be aware of. The further you’ve moved along the Reputation track, the more each of your fulfilled Order cards will be worth at the end of the game. It’s where the glut of your end game victory points are going to come from. End game points also come from any Public Contracts you might have claimed as well as for leftover resources (one point for every ten).
Thoughts
There’s a lot to like about Woodcraft and very few things I can find to complain about. So, let’s get those few things out of the way before I talk about how awesome this game is. And, spoilers, it’s pretty awesome.
For starters, I have an issue with the rule book. While most of the rule book is well written with plenty of helpful illustrations and examples presented, there is one small area that is likely to cause some consternation. On page 16 of the rule book, under the Income Phase section, Step 5 reads:
“5. After rounds 4 and 12, discard the helper and the order from the place marked X and slide the other cards as shown by the arrows. Deal a new helper and a new order to the empty spaces.”
Firstly, the Income board is double-sided for different player counts and there is very clear iconography on the Round track to signal when an Income Phase should be performed. On both sides of the board, this iconography is shown on the space between the 4 and then 5. But neither side of the board shows this iconography between the 12 and 13.
The side of the board for the one to three player count shows the iconography between 4 and 5, 8 and 9, 11 and 12, and after 14. The opposite side shows the iconography between 4 and 5, 7 and 8, 10 and 11, and after 13. I feel like the rule book should have read something more along the lines of:
“5. After rounds 4 and 11 (for 1/2/3 players) or rounds 4 and 10 (four 4 players), discard the helper and the order from the place marked X and slide the other cards as shown by the arrows. Deal a new helper and a new order to the empty spaces.”
Or better yet, they could have just said: “Whenever you encounter <insert iconography> along the Round track, discard the helper…” and avoided all the clunky numbers entirely.
Secondly, let’s examine the second half of that directive, the “discard the helper and the order from the place marked X…” part. Looking at the ends of the card rows on the Scoring board, you’ll see that there are two places marked X on these rows. Well, the directive refers to a singular “place”. The directive should read “places”. It might seem like a small thing, but there are people that have posted to the BGG forums for this game that have legitimately gotten confused. And, more annoyingly than these mistakes existing in the rules, is the total lack of response from the publisher or designer in regards to people asking questions about them. We, as players, shouldn’t have to speculate about these things and I certainly hope that future editions will see these errors rectified. It is also my fervent hope that someone official will step forward to issue summary judgments on both issues.
These are small potatoes compared to my other gripe: the role that luck plays when it comes to completing Orders. There are many times during the course of a game where a player has acquired some dice through some means (a Helper, leftovers from fulfilling a previous Order, rewards from completing previous Orders, etc.) and the next Order card that flips up happens to almost precisely match up with whatever random dice they just happen to have in their workshop at the time. And, there are just as many times when it comes around to your turn and none of the Orders on offer match up to your dice. Either way it goes, you, as a player, really have no control over the cards that will appear in the offer row at any given time. Of course, it’s always a welcome treat when luck shakes out your way. But it’s a real downer when it doesn’t. And it’s especially disheartening when you see things shaking out well for everyone but you.
Many games that have some kind of offer row feature a mechanic to clear the row and replace it with new cards (Lords of Waterdeep, for example). I wish Woodcraft offered the same. While it isn’t a perfect solution, it would at least provide the players with some kind of control over the situation. Don’t like what’s on offer? Well, here’s the option to spend a resource in order to refresh the row and hopefully get something you do like. In this case, you’ve added another layer of decision making. Do you really want to give up x to take a chance on the unknown or do you go with whatever’s on offer and try to make the best of it? Little decisions like these matter.
Thankfully, there are several checks and balances against the Order card issue. Consider the Reputation track. Without Reputation, those Orders you fulfilled are pretty much worthless aside from whatever benefit they provided whenever they were fulfilled. If you hope to turn those fulfilled Orders into lots of end-game victory points, then you’ll need to pay attention to your Reputation. And raising your Reputation isn’t easy. So, you’ll have to find a balance between moving up on that track and knocking out Orders.
And there are plenty of other ways to score points, too. In a recent game, I acquired an early game Helper that allowed me to sell up to 5 different resources each turn for 2 blueberries each. I quickly realized that if I could put together a resource producing engine, I could conceivably earn enough blueberries to make a movement up my Marketing track at the end of each round. Furthermore, I noticed that there was a Public Contract in play that awarded me bonus points at the end of the game based on how far I’d managed to move up my Marketing track. So, I went all in on one of my hazelnut Order cards right off the bat so that I could get a cube onto the Contract ASAP.
It was a risky move because those Orders are not easy to fulfill and they start very low on the Order card row. But, I calculated that if I could pull it off, it would translate into a ton of points for me over the course of, and at the end of, the game. I did so well with this strategy, in fact, that I only bothered with two other Order cards altogether, aside from the four the game forced me to play. My primary focuses in that game were my Marketing track and trying to move along the Reputation track or, at the very least, not moving backwards along it if I could help it.
And that’s just one example of the depth of strategy that Woodcraft offers. It’s a brilliant design. Each of the game’s various mechanisms meshes with the others like gears in a finely tuned machine. It took me a few plays to realize that. My first play through saw me coming in a distant last place, frustrated and feeling beaten down, yet excited to climb back on the proverbial horse and try again.
So, be aware, this is a game with a bit of a learning curve. You’re probably not going to do well your first few times around. But, keep at it and you’ll be turning that rickety birdhouse into a palatial avian mansion before you know it. The journey’s rough, but the destination makes it all worth it in the end.