Disclosure: Meeple Mountain received a free copy of this product in exchange for an honest, unbiased review. This review is not intended to be an endorsement.
Hello and welcome to ‘Focused on Feld’. In this series of reviews, I am working my way through Stefan Feld’s entire catalogue. Over the years, I have hunted down and collected every title he has ever put out. Needless to say, I’m a fan of his work. I’m such a fan, in fact, that when I noticed there were no active Stefan Feld fan groups on Facebook, I created one of my own.
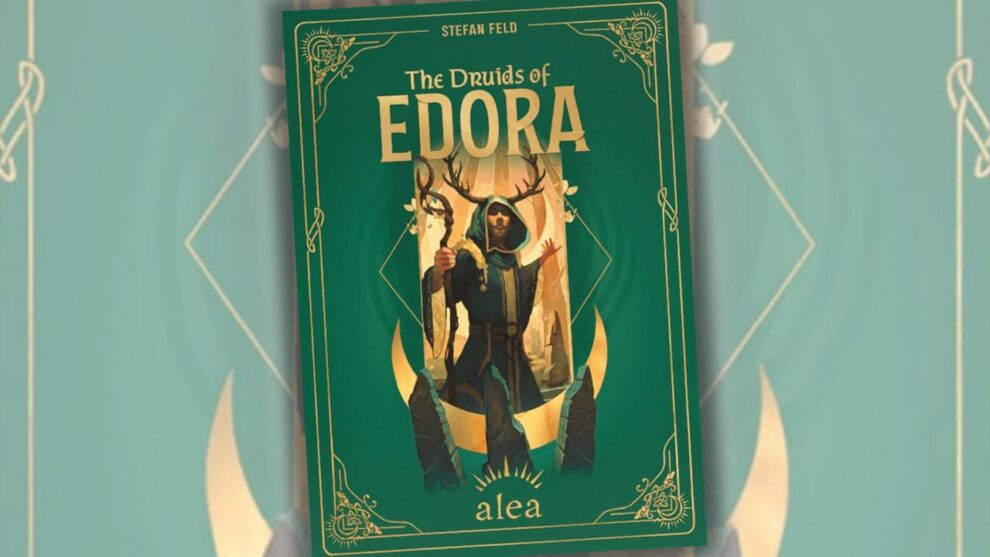
Today we’re going to talk about 2025’s The Druids of Edora, his 45th game. This marks his first team up with Alea Ravensburger since 2020’s The Castles of Tuscany. Remarkably, in that short time frame, Feld has added an additional 13 titles to his resume.
In The Druids of Edora, players take on the roles of druid clans competing for dominance and prestige against a mystical forest background ripped right out of a high fantasy novel. The forest is dotted with clearings, which contain shrines, and are connected to one another via a network of well-traveled pathways. Using their provisions, players will travel from shrine to shrine where they will perform various actions using their dice. It’s a Stefan Feld game so, it goes almost without saying, virtually everything you do is going to earn you prestige throughout the course of the game. At the end, whoever has earned the most prestige wins.
Of course, this is a high-level overview. If you’d like to learn more about how the game is played, read on. Otherwise, feel free to skip ahead to the Thoughts section to find out what I think.
Setup
First, the game board frame is assembled and filled in with the game board tiles such that each clearing contains a number of dice placement spaces equal to the player count. This modular layout virtually guarantees a unique layout of interconnected segments each and every game. Then, the dolmens (minus the neutral colored ones) are arranged along the edges of the game board such that there are at least two dolmens between each matching color. Amongst other things, players are going to be trying to link these together, by networking their dice, over the course of the game.
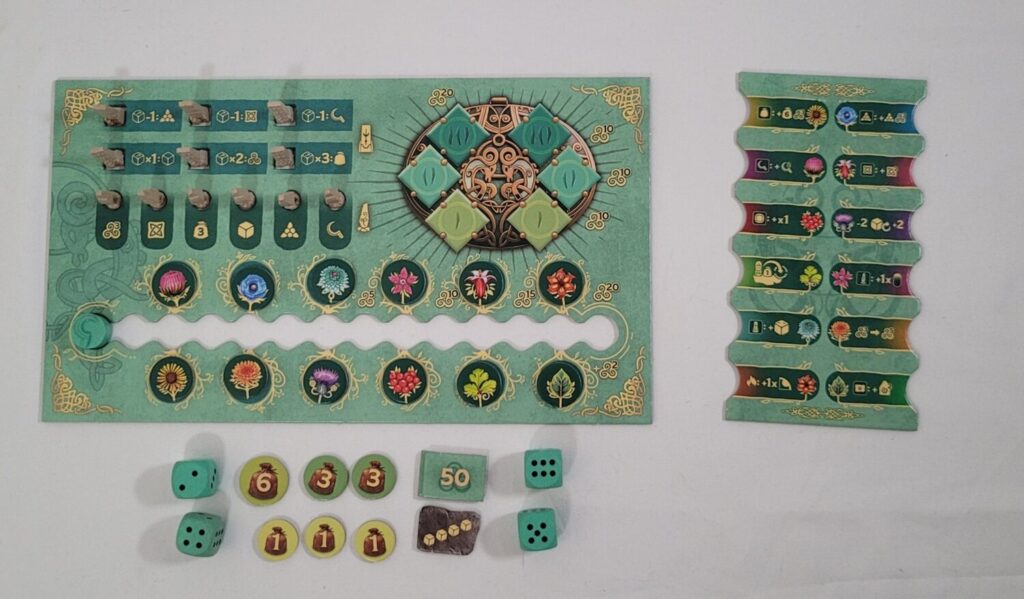
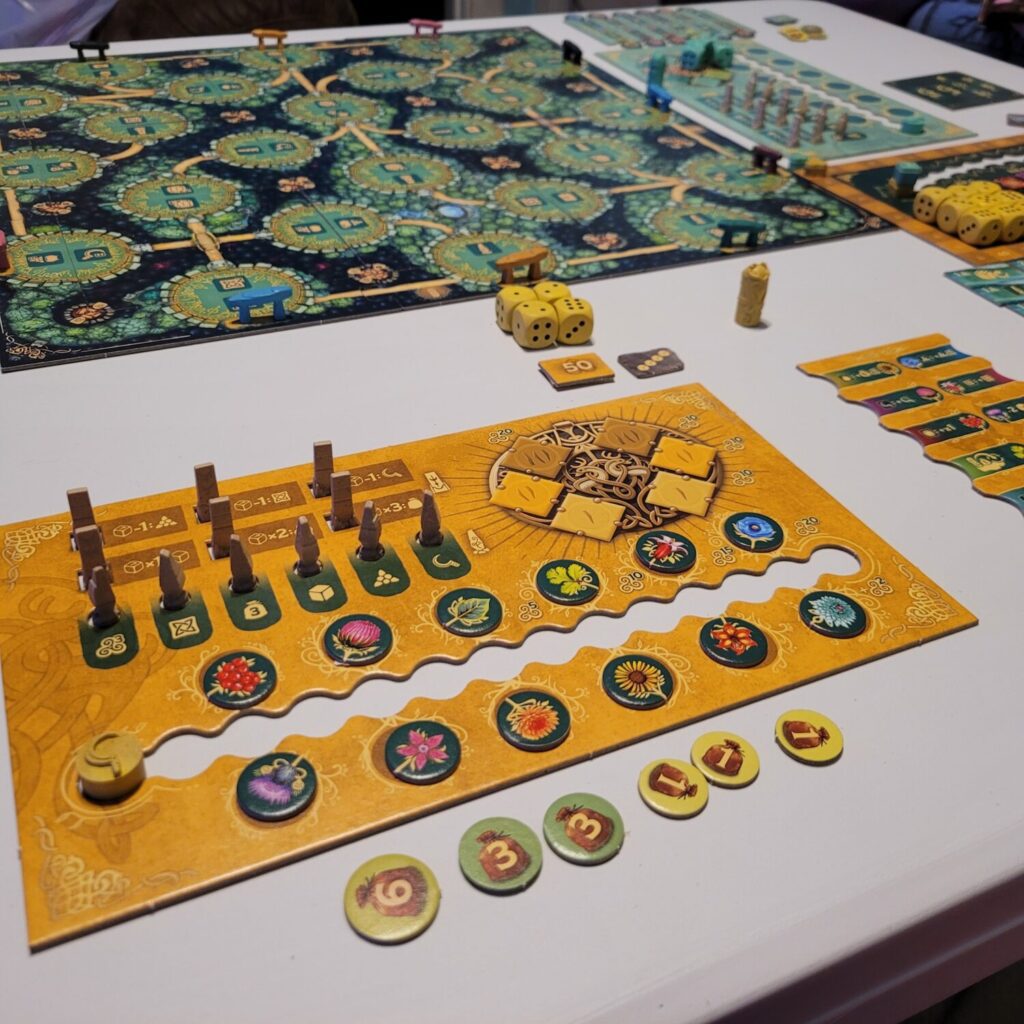
The players choose a color and receive the large player board, small player board, and other pieces of their chosen color. Each player rolls four of their dice and sets them next to their player board. They also receive one set of Medicinal Herb tokens, fifteen Provisions, six standing stones, and six runestones. The large player board features an area at the top left of the board for the standing stones and runestones. Beneath this area is the Medicinal Herbs track, which is randomly seeded with the player’s Medicinal Herb tokens. The player’s Sickle marker is placed at the start of this track.
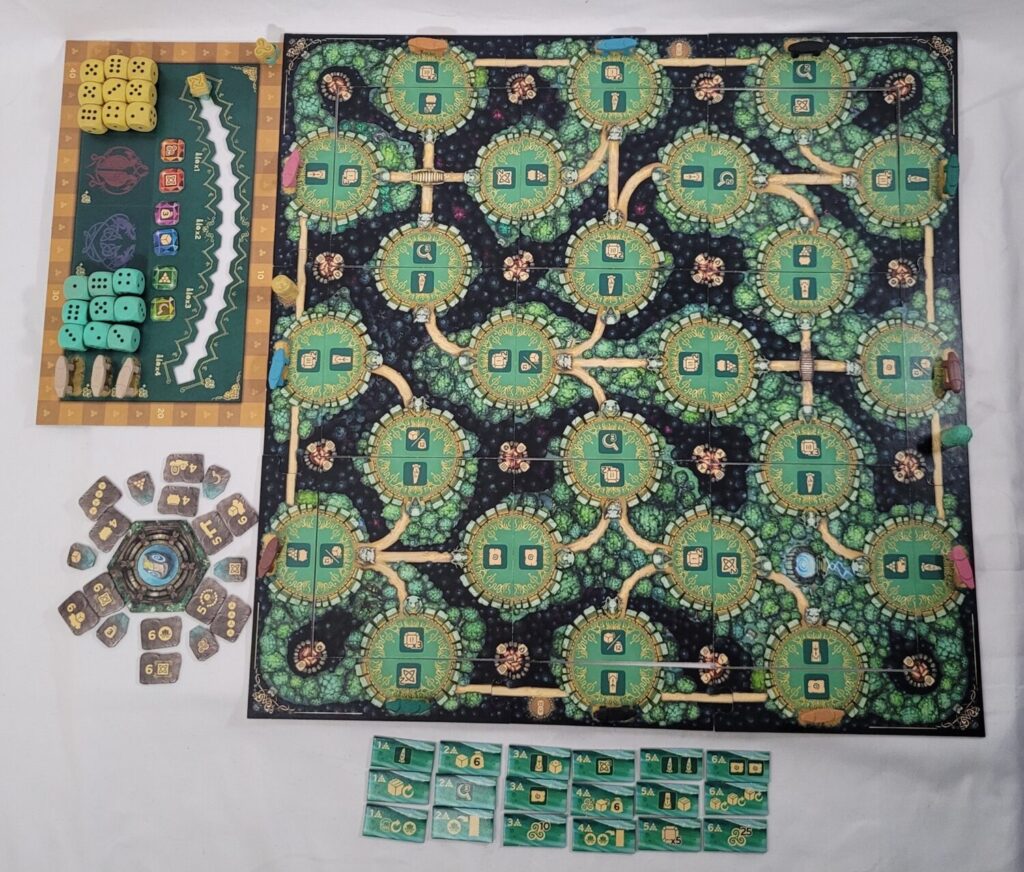
Then, the Overview board is set close by and populated with the players’ knowledge tokens, score markers, and a copy of each jewel token type equal to the player count. Players then roll their remaining nine dice and place them onto the marked location. The three neutral colored dolmens are placed into their locations at the bottom right of this board.
Next, the Oracle site tile is laid out and surrounded by a number of Stone Tablet tokens with an Oracle stone in between each grouping. The Magic Potion tiles are laid out and arranged in a grid by their cost. The Fire tokens, Mistletoe tokens, and Provisions are kept in a supply close by. Finally, a starting player is selected and given the Starting Player Card. Now, you’re ready to begin playing The Druids of Edora.
Turn Structure
On a player’s turn, they must move, place a die, check for competition, perform an action, check for fire pit completion, check for connected dolmens, and then deal with any Medicinal Herbs that may have been released.
Movement costs provisions, and the amount of provisions required depends entirely upon whether or not you’re moving through a dark forest area, along a road, or through a connected clearing. Each shrine is in a clearing, but some clearings are part of a larger group of forested area. These clearings are considered to be ‘connected’. Once you’ve reached a new clearing, there will always be at least one space available for you to place a die upon.
The value of the die placed is important for a number of reasons. Firstly, you must pay provisions to the supply equal to the pip value. Secondly, you’re going to check for competition. If other dice are present in the clearing, you’ll compare them to see whose die has the highest value, and that player will receive two prestige. Thirdly, some actions are dependent on the value. Lastly, during end-of-game scoring, players are going to score points for clearings in which they have the highest valued die.
The game board is dotted with fire pits at the intersections of the tiles that make up the game board. After you’ve placed your die into a clearing, you’ll take a look at the fire pits surrounding where you’ve placed your die. If you’ve got a die in each of the shrines that border one of these fire pits, then you’ll earn all the benefits depicted before covering the space with a Fire token.
If the shrine on which you’ve placed your die is on an edge next to an unclaimed dolmen, you’ll locate the matching, same-colored, dolmen and check to see if you have an unbroken network of dice in each clearing between the two. If you are able to connect them together, you’ll earn two prestige for every die in the connection. If the connection is one of the first three connections made in the game, you’ll collect a bonus neutral dolmen from the Overview board and earn prestige based on which neutral dolmen you collected.
Lastly, if the action you performed caused your Sickle token to move along the Medicinal Herbs track on your large player board, unlocking at least one pair of Medicinal herbs, then you’ll have to consider each pair, allocating one the tokens in the pair to an active status and the other to an inactive status. Active herbs are placed face up next to their matching spots on the small player board. Inactive herbs are placed face down. Each Medicinal Herb provides a unique bonus (earning extra prestige for performing specific actions, boosting the effectiveness of certain actions, or giving you the ability to adjust your die values before placing them, to name a few).
The Actions
Each shrine will consist of a number of dice placement spaces equal to the player count and can only contain one die from each player. Each space contains an icon corresponding to one of the game’s eight different actions:
- Take 12 provisions or 3 of your dice from the Overview board. This is pretty self-explanatory.
- Move your Knowledge marker forward one space on the Overview board. Every few steps on the Knowledge track of the Overview board depicts a multiplier above it. This is used for end-of-game scoring purposes. The players’ positions along the Knowledge track is also how ties are broken.
- Move your Sickle forward 2 or 3 spaces on your Medicinal Herbs track. If you unlock two Medicinal Herbs, they are removed from your large player board as a pair. If you should remove a second or third set, they are also removed as pairs. In this way, during the Medicinal Herbs portion of your turn, you’ll always be selecting herbs from one pair of herbs at a time.
- Take a Stone Tablet. Each of these will earn you 10 prestige at the end of the game if you’re able to fulfill their conditions. You also get to take the bonuses from the Oracle Stones on either side of the tablet you choose to take.
5. Take and use Mistletoe. Receive a number of Mistletoe tokens, and brew either 1 or 2 potions. Each potion costs a specific amount of Mistletoe and must be used immediately after brewing it. These all provide you with some useful, immediate benefit (extra dice, extra provisions, an influx of prestige, etc.) Unused Mistletoe tokens can be saved for later use.
- Add a Gem to your Amulet. Each player board depicts an amulet with six spaces. The two spaces of the top row are labeled with a Roman numeral I, the second row with a II, and the third with a III. Choose a gem from the Overview board you haven’t chosen yet, place it onto the Roman numeral matching the space you placed your die on, and perform the action associated with the gem a number of times equal to the multiplier printed on the die space.
7. Erect a Standing Stone. Remove one the Standing Stones from your player board, place it into the clearing where you placed your die, and receive its associated bonus. Then, receive the bonuses from every Standing Stone you’ve placed once again (including the one you just placed).
- Erect a Runestone. Take one of the Runestones from your player board, place it onto the clearing where you placed your die, and receive its associated reward. The type of reward you receive is dependent on which Runestone you placed. The amount is based on the pip value of the die you used.
If you can’t move due to not having enough provisions or dice, or you choose not to move, you must take the “Druid in Distress” action. For this, you will receive six provisions and one of your dice from the Overview board. This is usually not a position you want to find yourself in. That is because the game end is triggered as soon as someone has placed their final die. Then, the round is finished, and end-of-game scoring is performed.
End of Game Scoring
Players earn prestige: for leftover resources, based on how far they’ve moved their sickle along the Medicinal Herbs track, and how many Stone Tablets they’ve completed. Players also score points from their amulets and possibly shrines on the main board. If a player has managed to complete the entire left column of their amulet, they’ll score 20 prestige. If they’ve managed to complete a row, they’ll earn an additional 10 prestige per row. The shrine scoring is a bit more complex.
Each clearing that has dice placed upon it is looked at. Every die except for the highest value die is removed from the space. Then, each player will collect their dice and all the Standing Stones and Runestones that were placed on the clearing from which they collected dice. Next, they’ll add up the total number of dice, Standing Stones, and Runestones collected in this way and multiply that total by the highest multiplier they unlocked on the Knowledge track. That value is added to their overall score.
Thoughts
The moment that I first saw the box art pop up on BoardGameGeek for this game way back in February of 2025, I was excited. As a die hard Stefan Feld fan, the news of any brand new design by him immediately captures my attention. And those images left a lot to the imagination because they told me absolutely nothing about the game. At the time, the game’s page was just an empty placeholder filled with nought but promise and a single, titillating image.
I was entranced, checking the page for new information on an almost daily basis. Then, as Essen Spiel approached, details began to emerge. Worker placement with dice? Area control? Path building? These are some of my favorite mechanisms. And, the fact they were contained within a new title by one of my favorite designers left me chomping at the bit to get my hands on a copy.
Now, here we are, copy in hand, with several games under my belt. And, let me tell you, it hasn’t been an easy ride.
My first playthrough of the game left me feeling angry and frustrated, feelings one typically doesn’t associate with great games. Almost from the get-go, we ran into issues that had me poring through the rulebook and Glossary searching for answers that simply weren’t there. Things like:
– Your starting location is right next to a specific shrine. Are you required to go to this shrine? Does placing your playing figure into this shrine cost you provisions? Without any guidance from the rule book, we collectively decided that, since your playing figure starts in between two shrines, you have access to both, and must pay the provisions to move into them accordingly.
– Clearings are not adequately defined. The term is used frequently for a large portion of the rules, and it is just assumed that you have an idea of what’s being discussed. The term is finally defined in the Medicinal Herbs almanac on page 10 as: “= connected light-colored forest area”. Since a single shrine in a single circle of forest isn’t actually connected to anything else, is a single shrine in a single circle of forest considered a clearing? It is heavily implied by the scoring criteria of some of the stone tablets, but maybe I’m wrong?
– Are potions supposed to be used immediately? It is heavily implied, but it is never explicitly stated anywhere.
– Can a player double back into a shrine where they’ve already placed a die and then place another? The rules never explicitly forbid it, but it seems counterintuitive, so we house-ruled that you may not do this.
– Can mistletoe be saved up for use on another turn? The “Take and use mistletoe” section on page 6 of the rulebook states: “…you may now (and only now) use mistletoe (by returning it to the general supply) to brew potions.” This reads like: “This is the only time mistletoe is going to be used for anything”. That’s fair. But, the Potions section of the Glossary reads: “…mistletoe can’t be saved for later!”. Does that mean your entire pool of mistletoe gets emptied even if you don’t use it? If so, that seems pretty harsh. And, if this is true, shouldn’t something that important be in the rulebook instead of being buried in a single line of text in the Glossary?
Speaking of which…
– Information that should be in the Glossary (i.e. what the various medicinal herbs do) is crammed into the rule book instead. And, honestly, all of that information should be included on a player aid, which brings me to my next point…
– there is not a single player aid included
– the only thing even coming close to a player aid also serves as the starting player marker. This thing gets passed around a lot, so it stands to reason that something else should have been provided to serve as a starting player marker instead.
– The score track is almost entirely bereft of numbers (every ten steps is numbered), with alternating squares of different colors, so figuring out how to move your score marker from where it currently sits to some arbitrary number, like 17, spaces away is no easy feat.
Thankfully, the forums on BoardGameGeek provided our answers (with Herr Feld himself even popping up to clarify a few)! It was while reading through those that I learned a revised edition of the rule book has been posted to the BGG files section. I’m pleased to say that, aside from the lack of player aids and the terrible score track, all of my other gripes—re: the actual rules—have been addressed. Why such a badly written first edition of the rules was ever published in the first place is beyond me. If my questions were weird edge case scenarios, the lack of answers would be understandable. But, they’re not. These are issues that even the most cursory of blind-playtesting should have picked up.
I love Stefan Feld’s designs so much that having to write all that was physically painful for me. However, as a reviewer, I owe it to you to present an honest portrait of what you’ll experience should you open this box. So, heed my advice: you’re going to want to download and print out the most current versions of the rules and the Glossary before you get started.
But, once you get to the point where you can finally play with an understanding of the rules and the game’s intricacies, a truly brilliant design emerges. In The Druids of Edora, Stefan Feld does what he does best. At every turn, you’re presented with a wide range of possibilities. You’ll want to do everything, but you won’t be able to because your time is limited. Virtually everything you do is going to score points, and figuring out how to min-max your turns to eke out as many as you can presents an interesting and unique puzzle every time you play.
For instance, in The Druids of Edora, you live and you die by your provisions. Do you go hard on those at the beginning of the game, building up a stockpile, or do you hold out until you absolutely need them? Are your opponents hurting for provisions? Maybe sweeping in to a location within their easy reach and taking the provision action away from them might be a good move. But, with only thirteen actions available to you, at minimum, maybe your time would be better spent on enhancing your own standing. Then again, if you hold out for too long, your opponents may swoop in and take those provision opportunities away from you instead!
This brings me to another negative, one about the game design and less about the deeply troublesome rulebook. In many dice games, rolling high is something players aspire to. High numbers generally mean better opportunities and better payouts. But, in The Druids of Edora, if you’re stuck with a bunch of high numbers, you’re at a functional disadvantage. Outside of using a special power from a potion or a Medicinal herb or some other thing, you’re never allowed to adjust the value of your dice. When you place a die, you have to pay provisions equal to the die’s pip value. This means a player with mostly high numbers is going to be forced to spend provisions at an accelerated rate, forcing them down a path of provision acquisition that opponents with a more even spread of numbers don’t have to consider. That’s frustrating because the opportunities and means by which to manipulate your dice are light on the ground and take a considerable opportunity investment to get to if you’re ever stuck in this unfortunate situation. The opportunities exist, but I wish there were more of them, and I wish they were easier to get to. For instance, instead of the “Druids in Distress” action allowing you to just take one of your dice from the Overview board, why not be able to take said die and also re-roll it, if you so desire? Fortunately, Feld has suggested a few variants that address these inequalities, but I wish there were methods baked into the game’s DNA itself without having to play the game using a variant.
At this point, having read my entire list of negatives, you might have gotten the impression that I am not a fan of this game. That couldn’t be any further from the truth. I love this game, and it’s easily become my current obsession. At this point, I think my wife is getting tired of me recommending it whenever we’re sitting down to play a game and are trying to figure out what to play. While The Druids of Edora doesn’t crack my list of Top 5 Favorite Feld games, it almost does, sliding into the #6 spot right behind (in order) The Oracle of Delphi, Civolution, Marrakesh, Bonfire, and The Castles of Burgundy.
Tight decision spaces. Interesting and engaging gameplay. Points galore. The Druids of Edora is Feld at his best, and I am excited for what the future holds in store.