
Disclosure: Meeple Mountain received a free copy of this product in exchange for an honest, unbiased review. This review is not intended to be an endorsement.

Creak, swish. Creak, swish. Creak, swish.
Each time Olaf Magnusson’s horse took another step, the metal buckles of the harness rubbed against one another.
Creak, swish.
The ride overland had been a long one and Olaf was about ready to get out of this godforsaken saddle with its irritating sounds. His irritation was tempered by his anticipation of what was up ahead. Several months had passed since he’d issued his challenge and today was the day he would finally get to see the fruits of his ambitious proposal for himself.
Just up ahead his lieutenants had dismounted and reached the edge of the cliff face and were looking back at him expectantly. The looks on their faces reflected neither excitement nor disappointment, much to Olaf’s chagrin, so there was no indication of what he should be expecting.
As he got closer, he dismounted and handed the reins of his horse to one of his attendants. As he stepped off, the breeze coming up from the harbor below picked up, enveloping him in a welcome embrace. His hair whipped around his face. His cloak snapped out behind him. The grass beneath his feet crunched in the early frost. Being careful to never avert his gaze, he stepped forward, not wanting to spoil anything until he was ready.
When he finally reached the precipice, a cheer erupted from the harbor below. His subjects had come out in full force to see their chieftain, to share in this joyous occasion. Bolstered by the excitement of the crowd, he finally allowed himself to look down to see what his people had wrought and what he saw amazed him.
When he’d initially issued his challenge, he’d expected a few hundred ships at the most, not the thousands that stretched out before him as far as the eye could see. There were ships of every type imaginable: ferjes, karvs, knarrs, drakkars – ships for war and commerce both. The sheer magnitude of the scale of the fleet before him, the unexpected nature of the results of his contest, took his breath away and caused his heart to swell with pride. And with that pride grew his ambition. With a fleet like this at his command, Chieftain Olaf Magnusson no longer needed to content himself with being the king of a middle-sized settlement of Viking raiders. With a fleet of this size, he could become king of all of the Vikings. This, he decided, was a sound plan. He had his fleet. Now all he needed were the men and women to manage it. He needed soldiers. He needed provisions and funding. But first he needed to announce a winner.
After a quick conference with his lieutenants to gather the results, he stepped forward and waved the crowd below to silence. He cleared his throat and began speaking…
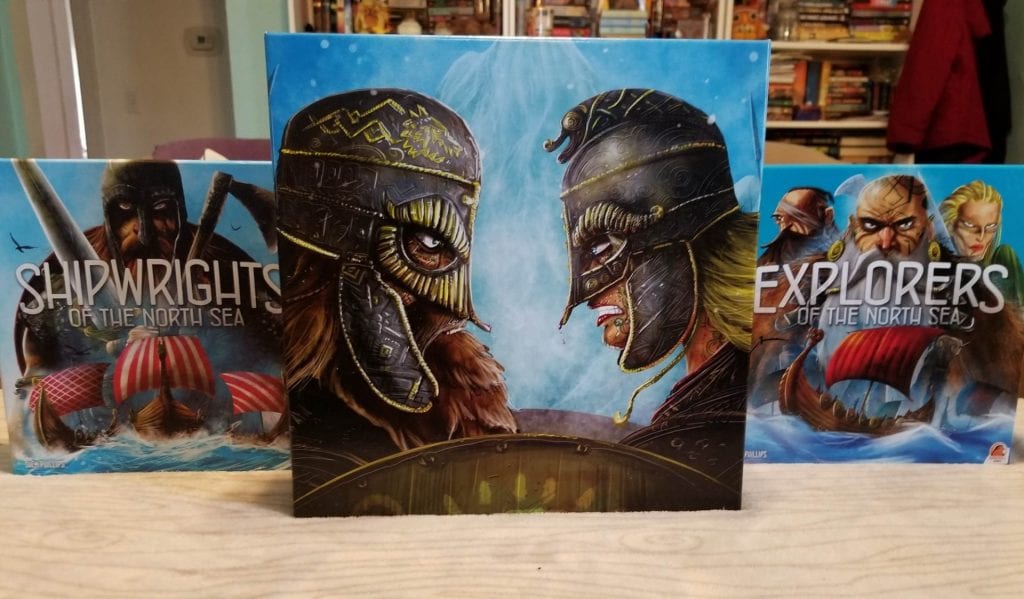
Raiders of the North Sea picks up where Shipwrights of the North Sea left off (as did the above introductory story). In the game, each player controls a raiding party. They will compete to gather the resources needed to hire new crew members, provision them for the trip upriver, and manage their strength to overcome the opposition they will face. After conquering the settlements and forts they will encounter, the players will gather the riches they have found and bring them back to the Chieftain to gain power and influence. Along the way some soldiers will fall and be carried away to their eternal reward in Valhalla. This creates a vacancy that must be filled with new blood. Thus the cycle continues. Raid, reap the rewards, rebuild.
Raiders of the North Sea is a worker placement game with a unique twist. Each time a player places a worker onto the board to take a location’s action, they will then remove a worker from a different location to perform that location’s action as well. This means that the players have some agency over what the next player in line will be able to choose from.
As the players build up their strength and send out their raiding forces, the number of available raiding locations will begin to dwindle until only a few remain. This triggers the end game and once the game concludes, the players will tally up their final scores and the player with the highest score wins.
Of course this is just a high level overview of the game. If you’d like to learn how the game is played then continue reading. Otherwise, feel free to skip ahead to the Thoughts section.
Setup
To begin setting up Raiders of the North Sea (Raiders) set the game board onto the table and place all of the resource bits (iron, livestock, Valkyrie, and gold) into the cloth bag and mix them up thoroughly. Then populate the raiding locations with the appropriate amount of resources (dictated by iconography printed on each location) randomly drawn from the bag. Each location will also have a specific color of worker placed on it. A single black worker is then placed on each of the Gate House, Town Hall, and the Treasury locations.
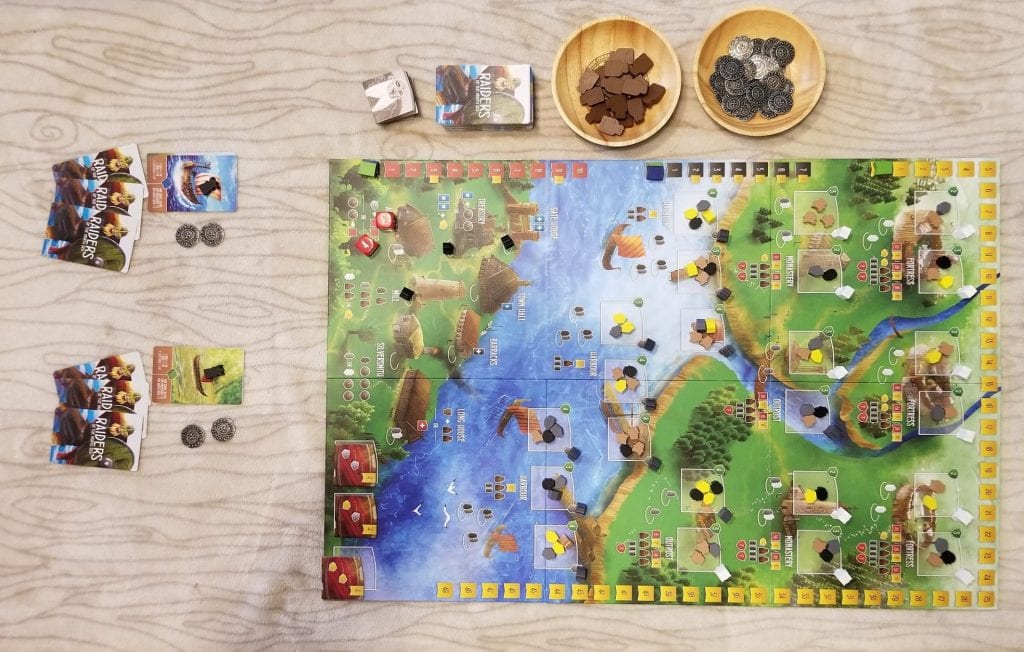
After this, there will be 4 black workers left. Each player will receive one of these along with 3 Score markers in whichever color they opt to play. One of these markers is placed onto the 0 space of the Armory track, one on the 0 space of the Valkyrie track, and one on the 0 space of the Victory Points (VP) track. Each player also receives 2 silver and 1 Ship card in their chosen color. The remaining silver, resource bits, and provision tiles are set off to the side to create general supplies of each.
Next, the Offering tiles are shuffled together and placed next to the board in a face down pile. Three of these are drawn and placed face up onto their appropriate location on the game board. Then the Townsfolk cards are shuffled and placed in a face down deck. Each player will be dealt 5 cards from the deck and will choose 3 to keep as their starting hand, discarding the remainders. Finally a starting player is determined by rolling the 2 supplied dice and you are ready to begin.
On Your Turn…
On your turn you will either be performing actions in the Village or raiding one of the locations on the board. In the Village, you will place whichever worker you’ve got in front of you onto a location on the board, perform that location’s action, and then remove a worker from a different location and perform that location’s action. When raiding one of the locations on the board, you will place your worker, perform the raid, then remove the plunder and the worker from that location.
Some actions/raids require specific colored workers to be placed in order for the action/raid to be performed. Some Village actions return different results depending on the color of worker used to perform the action. Before we can go into more detail about the actions, it helps to understand the cards that you’ll be holding in your hand.
The Townsfolk
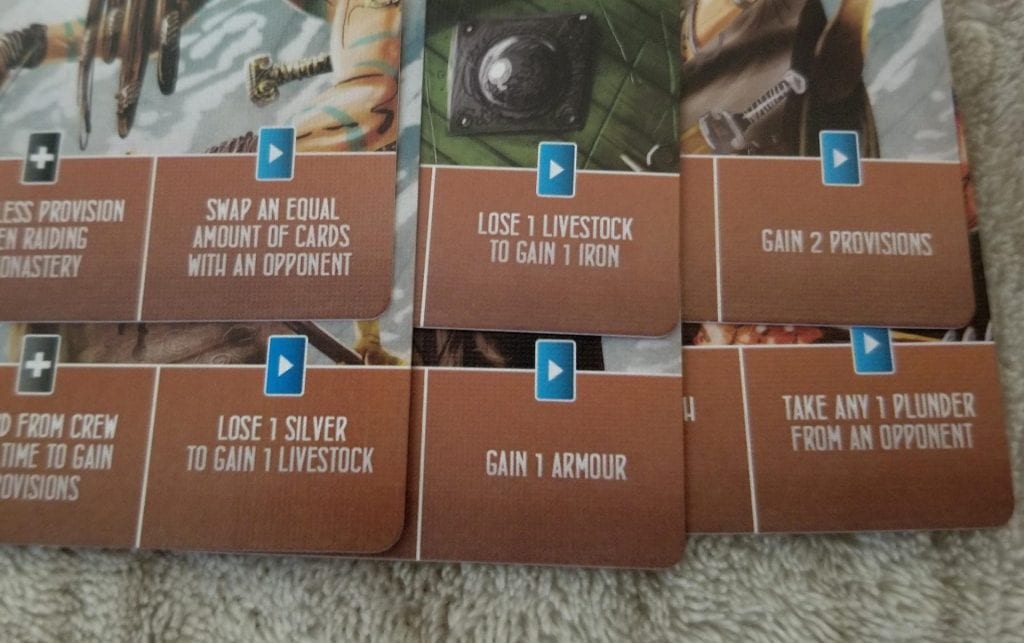
Each Townsfolk card contains several pieces of important information. Along the left hand side of the card is the character’s strength (the red icon), the cost in silver to hire the character to join your crew, and the character’s name. Along the bottom of the card are the character’s ‘Hired Crew’ and ‘Town Hall’ actions.

When adding Townsfolk to your crew, you can have as many copies of the card in your crew as you like with one exception. If the word “Hero” appears in the character’s name, you are only allowed a single copy of it. In fact, you are only allowed to have a single hero in your crew at any time, period. Hiring crew members will be discussed in the next section.
The Village
The Village is split up into 8 different buildings. At the beginning of the game, only 6 of these will be available to the players because the other two, the Armory and Long House, require workers of colors the players do not have immediate access to. The very first person to take their turn during the game will only be able to place their workers into 1 of 3 locations: the Barracks, Mill, and Silversmith.
The Barracks is where you hire new crew members. Once you’ve paid the cost in silver, you can place the crew member into one of the 5 available spots in your crew. If you should exceed 5, you must choose 1 to discard. Some crew members may have abilities that make this or other actions cheaper or somehow help the player to gain benefits from taking specific actions.
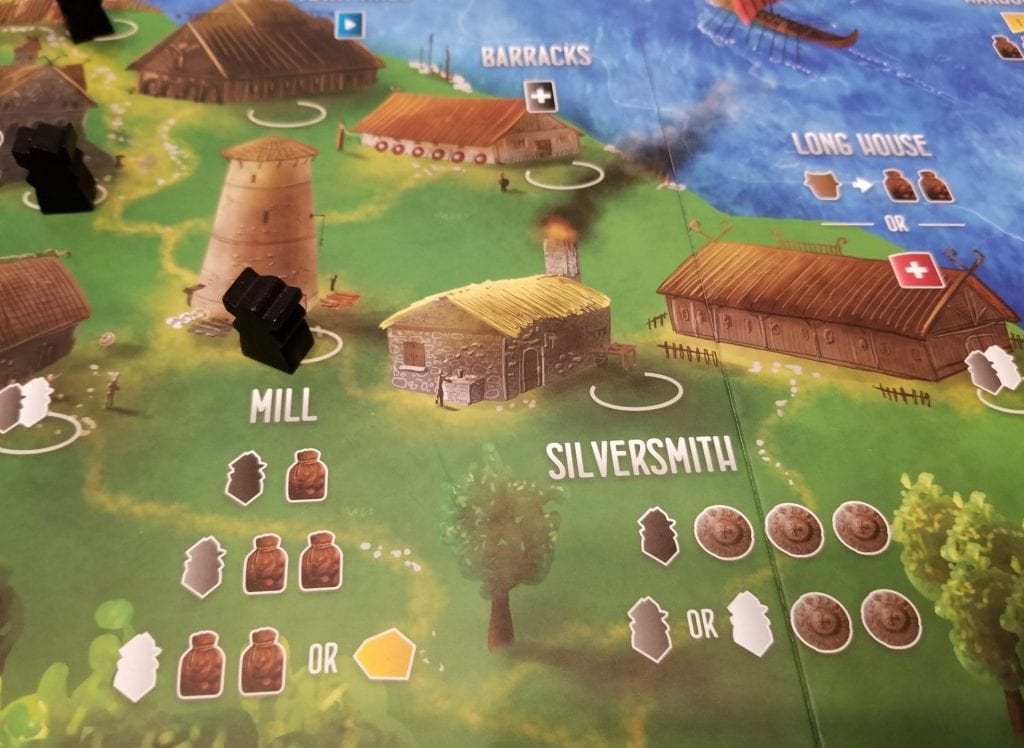
The Mill is where the players will gain the provisions needed for their raiding expeditions. Placing a black worker here rewards you with a single provision, a grey worker rewards you with 2, and a white worker rewards you with either 2 or a single piece of gold. Whenever an action would reward you with a resource, it is taken from the general supply.
The Silversmith rewards you with 3 silver if a black worker was placed here. Otherwise it rewards you with only 2.
After that first player has placed their very first worker, they will only have 3 locations to remove a worker from: the Gate House, the Treasury, or the Town Hall.
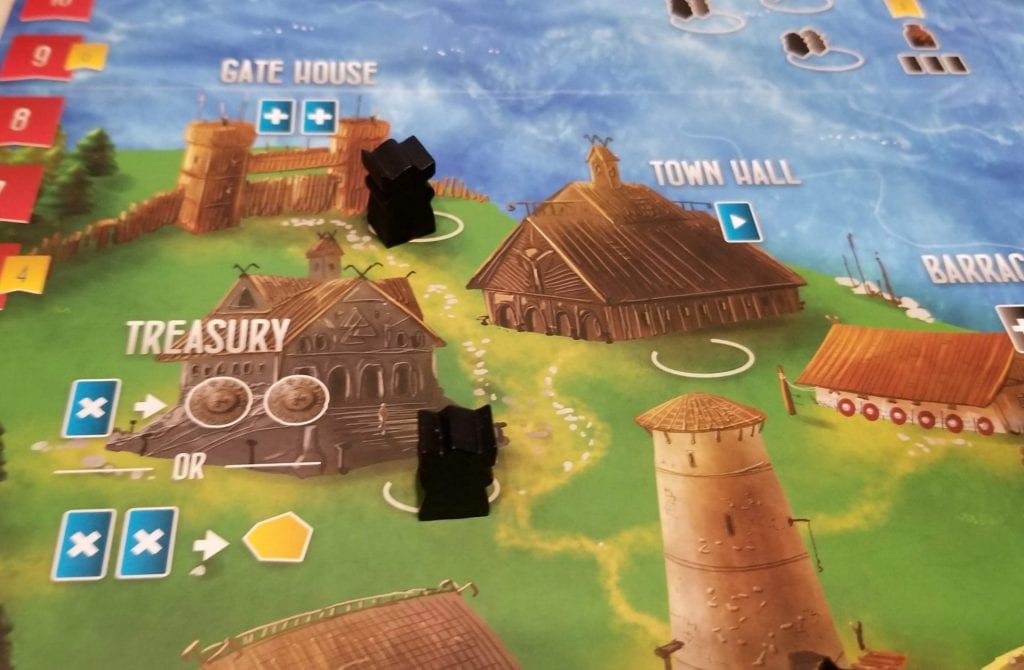
The Gate House allows you to draw 2 cards and add them to your hand. Your hand should be kept secret from the other players.
The Treasury rewards you with 2 silver if you discard a card or 1 gold if you discard 2 cards.
The Town Hall allows you to discard a Townsfolk card from your hand to utilize its Town Hall action. There are far too many of these actions to list them all here, but as examples: some allow you to give up one resource for another or discard the card to perform other actions more cheaply.
The remaining 2 action locations can only be utilized after you have collected grey or white workers. These are initially obtained by raiding, but can later be obtained as a result of picking them up once someone else has placed them into the Village area. These two locations are the Armory and the Long House. Since they are both so closely associated with other aspects of the game, raiding and completing Offerings respectively, I’ll cover them in the appropriate sections.
Raiding
Sprinkled around the upper portion of the game board are various raiding spots: Harbors, Monasteries, and Fortresses. Each of these spots has certain requirements that a player must meet in order for them to go raiding there: the specific worker type, the gold and/or provision requirements, and the minimum amount of crew required.
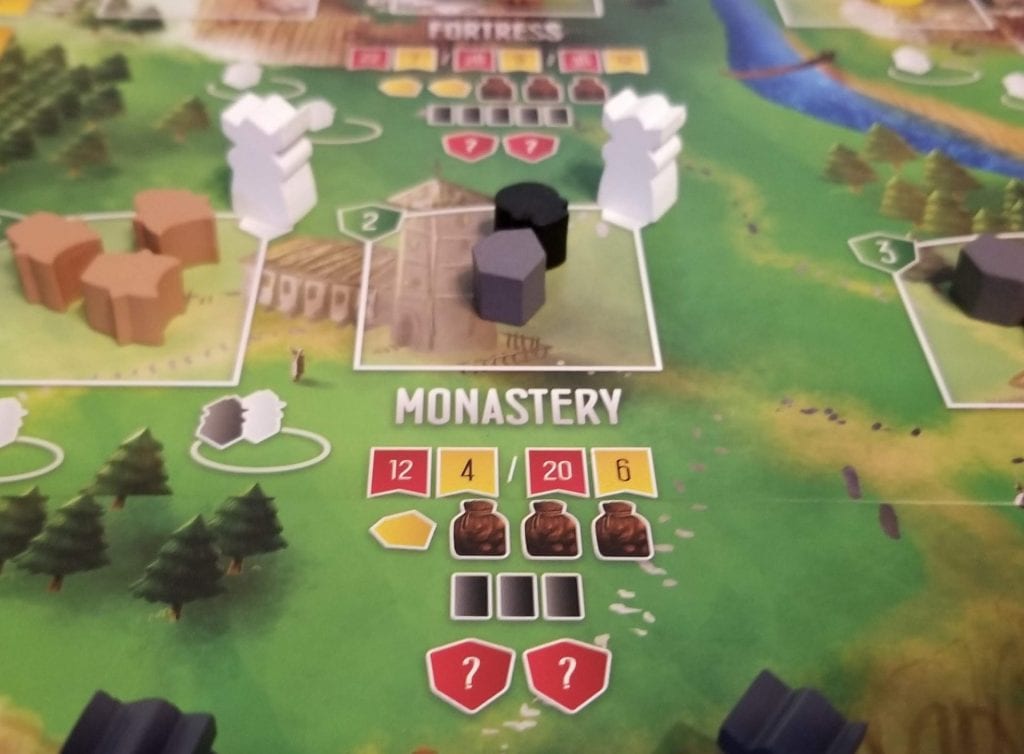
If the player is able to meet the requirements and pay the necessary resources, they will then add up all of the strength that they are able to bring to the fight. Strength comes from each crew member’s inherent strength, bonuses provided by certain crew members’ Hired Crew abilities, as well as the amount of strength shown by their Score marker on the Armory track. Then the player rolls the number of red dice shown and adds the total from that to their strength total. This new total is then compared to the red numbers above the raiding location. Depending on whether or not they are able to meet this threshold, they may be able to score the VP shown. If two different thresholds are shown, they will only score the VP for the highest one they are able to meet.
In the previous example, if the player is able to come up with 12 strength after adding their inherent strength total to the total derived from rolling the 2 red dice, they will earn 4 VP. If they are able to come up with at least 20 strength, though, they will earn 6 VP instead.
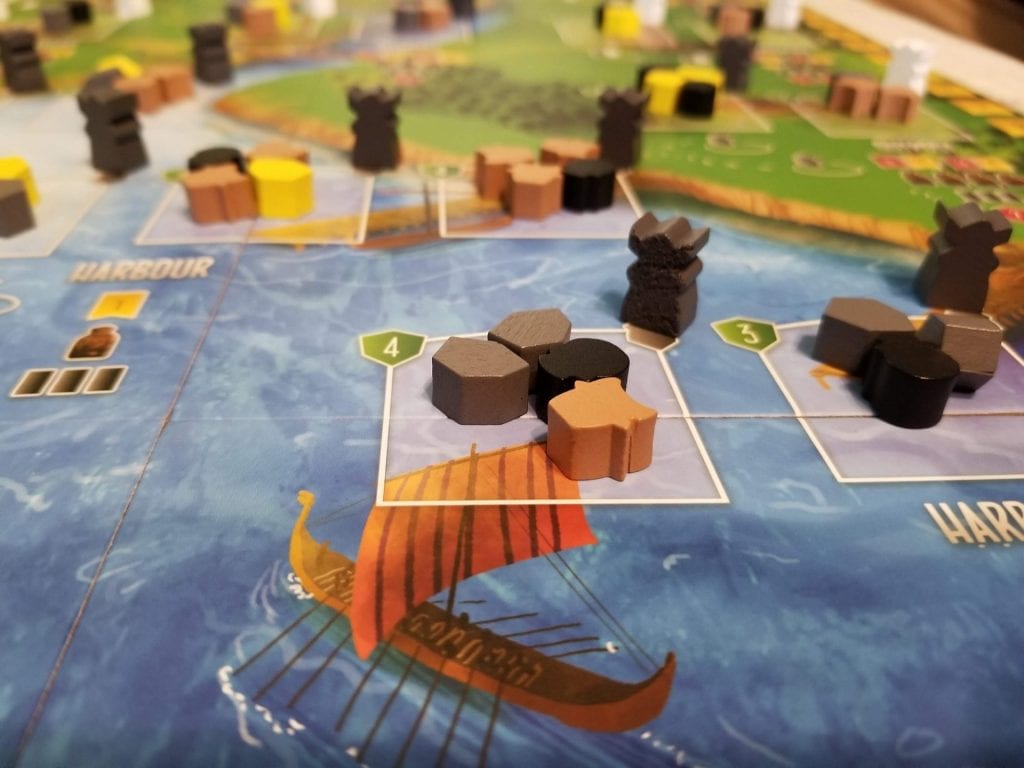
Once the player has raided a spot, they will choose one of the unclaimed locations there and collect the resources from it along with the worker that sits directly above it. For each Valkyrie collected this way, the player must discard a crew member from their already hired crew. For each crew member discarded, they will move their Score marker up the Valkyrie track 1 step. The higher up this track the player moves, the more VP they will earn at the end of the game.
In addition to the strength boost provided by the Armory track, crossing various thresholds on it will also earn you VP at the end of the game. The way to move your Score marker up this track is by utilizing the Armory Village location. A player using this location can give up either 1 iron or 2 silver to move up the Armory track 1 space.
While Raiders never forces you to go raiding, if you ignore this aspect of the game, you’re probably going to lose. It’s also worth noting that the only way to gain iron (and livestock for that matter) is from raiding. These resources hold even more importance at the Long House.
Homage to the Chieftain
While the Chieftain is happy to let you raid at your heart’s content, he also demands his cut and will reward the players that are able to present him Offerings with the blessed gift of VP.
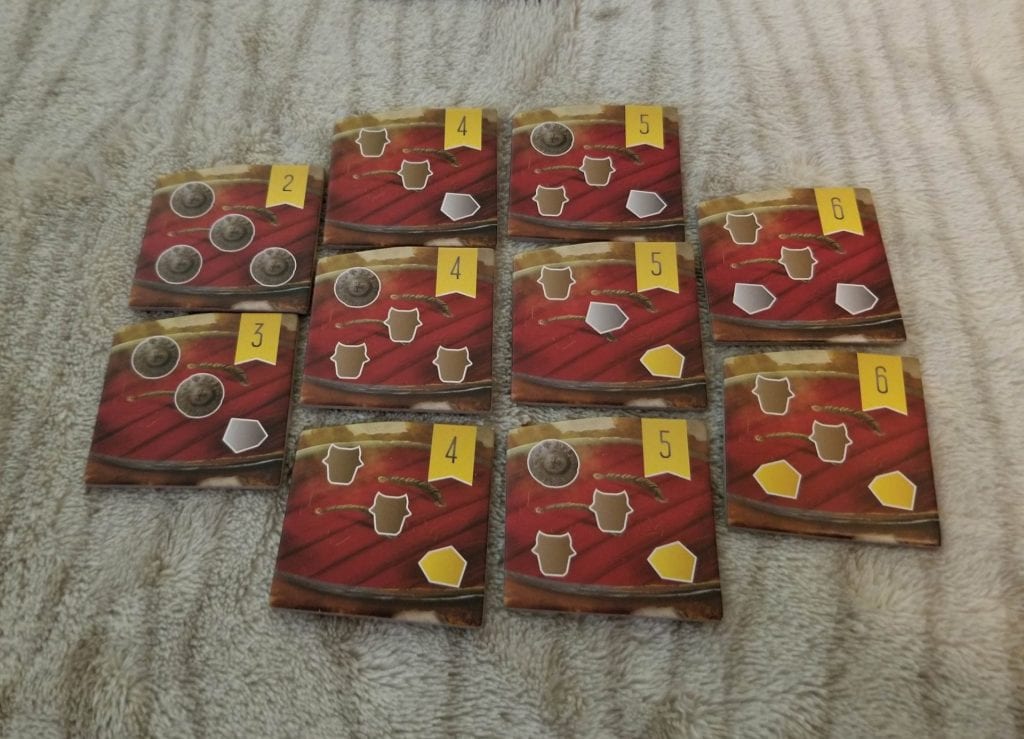
On display are 3 Offering tiles, each depicting a collection of resources and/or silver. A player using the Long House will be rewarded with one of these Offering tiles if they are able to discard the items depicted on it. The collected tile (which is immediately replaced with a new face up one) is kept secret until the end of the game where its VP will be added to the player’s grand total. Alternatively, a player can instead discard a single livestock at the Long House in order to gain 2 provisions.
The End Game
The end game is triggered in 1 of 3 ways: there is only 1 set of plunder left in the Fortresses, the Offering draw pile has been emptied, or there are no Valkyrie left on the board. At that point, the player that triggered the end game completes their turn. Then every player gets 1 final turn before tallying VP totals to determine the winner. The Ship cards each player received at the beginning of the game remind the players of where the VP come from.
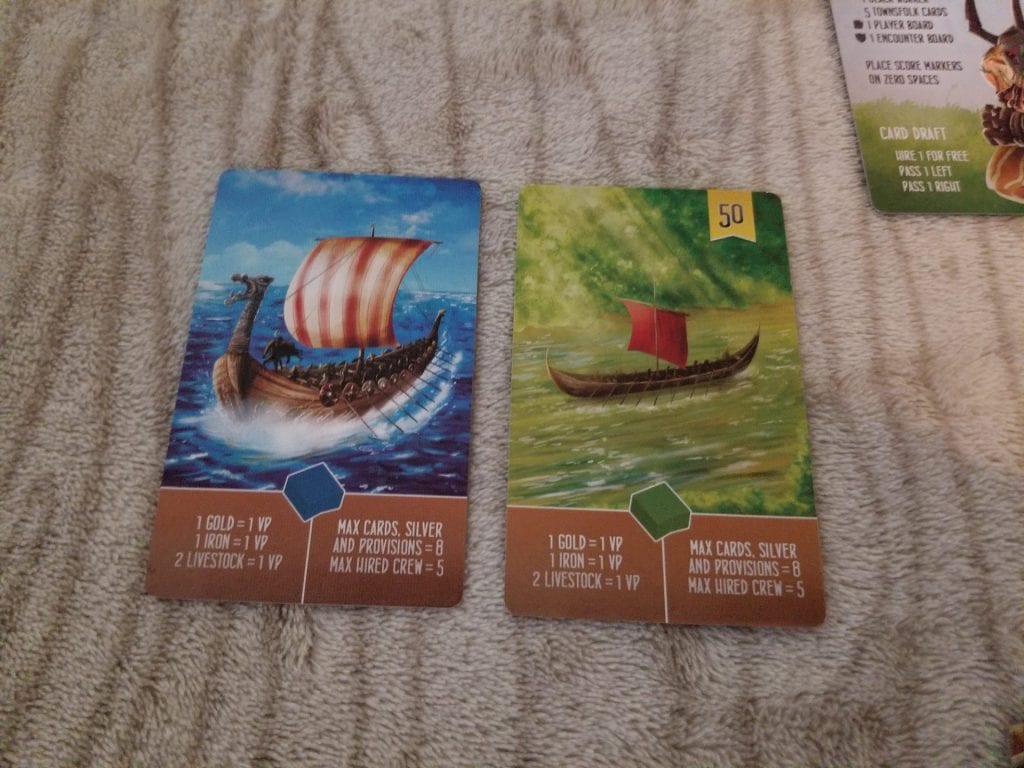
VP come from the Valkyrie track, the Armory track, collected Offering tiles, and some hired crew member abilities. Each leftover gold and iron are worth 1 VP each and every 2 livestock is worth another. The player with the most VP wins.
Thoughts
I was enamored with Raiders from the moment I first laid eyes on it on Kickstarter back in 2015. Unfortunately I wasn’t able to back the project during that campaign which ate away at me for the longest time. Everything that I knew about Raiders made me suspect that it would be a game that I’d really enjoy and I was just dying to find out if my suspicions were correct.
For starters, I am a sucker for worker placement games. Something about that mechanic really speaks to me. Secondly, when I see a game that is practically overflowing with bits and baubles, my eyes get large. It’s a thing that I’ve come to think of as “The Agricola Effect”. Agricola was the first worker placement game that I ever played and definitely the first game that I’d ever played that was as jam packed with components as it is. Because of that, and because it’s such a fantastic game, I think that it has become my subconscious benchmark for the things that I think will probably make a game extraordinary even if I’ve never actually played the game.
Then, along with all of that, factor in The Mico’s amazing artwork. I’m not sure that Raiders would have enjoyed the success it has if it weren’t for The Mico’s signature style. The Vikings, the ships, and everything else about the game just scream badassery. Raiders could have easily been another themeless euro, but Mihajlo Dimitrievski’s artwork breathes life into it and really sells the theme. When I play Raiders, I don’t feel like I’m just pushing cubes around. I feel like I am captaining a ship filled with Vikings that will mess you up.
Just when I was beginning to think that my prospects of obtaining the game were pretty much nonexistent, Shem Phillips created another Kickstarter in February of 2017 for 2 expansions to the game. I jumped on board without hesitation. When the campaign ended in March of that year, my very long wait began. Then, in July of that same year, before I had received my rewards from the campaign, someone brought Raiders to my monthly game group and I was fortunate enough to get a seat at the table and finally play the game I’d been dying to play for almost 2 years. Let me tell you, I was not disappointed. At least, not entirely.
I was immediately struck by the elegant simplicity of Raiders’s design. There’s really nothing overly complicated about it and it can usually be taught in its entirety in under 5 minutes. It’s so easy to teach and play, in fact, that it has garnered itself a place on many gamers’ lists of gateway games. It is an excellent introduction to the worker placement mechanic and to eurogames in general and sits right up there alongside Lords of Waterdeep or Stone Age which are also frequently hailed for being introductions to the same thing. I’d wager to say that Raiders is actually surpassing them now and that is in no small part because of The Mico’s artwork which I expounded upon earlier. Lords of Waterdeep and Stone Age are fairly blasé to look at, but Raiders is something else entirely. It’s a game full of eye candy and that’s often the difference between a new person getting sucked into the game or not enjoying the experience at all.
Also, having purchased and played many of Shem Phillips’s games as of this writing, it is easy for me to look at Raiders and realize that I’m witnessing the genesis of a great game designer when I am playing it. The other two games in the North Sea trilogy are fine games, but neither approaches the level of expertise that Raiders exudes. Raiders is so far removed from the other two games in that trilogy that it almost feels like it doesn’t belong there at all.
When you really get down to it, it’s all about the worker placement. Most worker placement games present you with a variety of options and your choice of where to send your worker also effectively decides where the following players will not be sending theirs. Raiders changes up the game because when you perform your actions not only are you helping yourself, but you’re also programming the next player’s turn. If you’re clever and pay attention to what your opponents are trying to accomplish, you can effectively frustrate their plans by forcing them to do things out of sequence.
For example, if your opponent is low on crew members and has an empty hand, chances are they’re going to be placing a worker at the Gate House to draw some Townsfolk cards and then picking up a worker from the Barracks to hire one of those cards into their crew. Knowing this, you can stymie their plans by using the Gate House yourself during the first half of your turn. Because the sequence is always place a worker and then pick up a worker, you make it impossible for them to carry out their plans, putting them into a situation of having to perform inefficiently. Raiders is such a finely tuned game that the point spread at the end of the game is usually only 1 or 2 points between first and second place. Utilizing the worker placement to hamper your opponents’ plans is crucial to performing well.
While Raiders works very well, not everything is perfect. Much of your success is going to come from raiding. Performing well in raids means having a strong crew. And quite frankly, if all you’re drawing are low strength crew members, it’s going to be hard to keep up with your opponents that aren’t sharing in your misfortune. I specifically mentioned the small gap between first and second place earlier, but the gap between first and third or first and fourth is often much, much wider. That gap is almost always due to bad card draws and there is nothing you can do in the game to alleviate this. This card drawing issue is the game’s only real weakness. The luck inherent in the dice rolls while raiding is easy to overcome. The luck inherent in drawing cards from a very large deck is not. Raiders would be near perfect if it had a method to accelerate card drawing or to draw a handful and select which ones to keep, but it doesn’t. Thankfully, much of this is addressed with aplomb in the expansions, but that’s a topic for another article.
All in all, I really love Raiders of the North Sea. It’s one of my top 10 board games, not because it’s an ultra-challenging brain burner, but because it isn’t. I like the way that it tickles my thinking synapses just enough to make them feel warm and tingly, but doesn’t overly tax them to the point of exhaustion. Raiders is easy without being insipid. I always feel engaged when I play and I’m always excited to play again when I’m done. I recommend it highly.
If Raiders of the North Sea sounds like something that might be right up your alley but you’re still on the fence, maybe try it in digital form first? It’s available on multiple platforms: iOS, Android, and even the Nintendo Switch for a fraction of the cost of the physical game.
Raiders of the North Sea details
- Designer: Shem Phillips
- Artists: Mihajlo Dimitrievski
- Publishers: Angry Lion Games, Banana Games, Ediciones Primigenio, Games Factory Publishing, Garphill Games, Ghenos Games, Kaissa Chess & Games, MeepleBR, Mosigra, Pixie Games, Renegade Game Studios, REXhry, Schwerkraft-Verlag, White Goblin Games, Ігромаг
- Release Date: 2015
- Player count : 2 - 4
- Age range : 12+
- Time range : 60 - 80 minutes
- Mechanism(s): Dice Rolling, Hand Management, Set Collection, Worker Placement, Worker Placement, Different Worker Types
- BGG Geek Rating: - converted to Meeple Mountain scale: .
- More articles about Raiders of the North Sea.


This looks interesting, and I do enjoy worker placement. So who knows?
Anyway — thanks for a wonderful review.
i have played this, dont waste your money its a bad game, why well, you spend most of the game building up your hand of viking raiders, but if you fail to raid a building or fort, you lose all of your raiding party and have to go back to the viking village, it will take you at least a few turns to build up another raiding party, which means every one else is now ahead of you. there is no way to catch up, if you fall behind. if one player is able to raid two forts while every one else raids one, that player will be the winner. you see there is no way to make a come back. once one players get more points then the other players in one turn, well thats it, that player is going to be the winner. yes you can send vikings to valhalia, but raiding still gets you more points, so there isnt any point to send vikings to valhalia. i found this game to be a disappointment. it looks good but thats it.
Hi, William
Firstly, thank you for taking the time to read my review and share your thoughts about the game. Secondly, I suspect that your displeasure with the game actually stems from getting some of the rules wrong.
You mention the concept of failing a raid. There is no such thing. As long as you have the required amount of provisions, crewmen, and gold (if applicable) then you automatically succeed. There is no minimum strength requirement to raid any of the locations on the board. However, some of them do provide victory points for meeting or exceeding certain strength thresholds, so it’s always a good idea to make sure you go into any raid with a decent amount of strength behind you. But you could also raid a location with five crew members of 0 strength if you were so possessed. This is actually a strategy that I have used multiple times as a means of denying the victory points to my opponents. Sure, I didn’t get bonus VP, but neither did my opponents.
Furthermore, the only way to lose a crew member is if you raid a location that has one or more Valkyrie tokens as some of the plunder. You can just avoid raiding these locations entirely or try to plan accordingly. The Berserker, for instance, returns to your hand when he dies in battle. If you give him up to the Valkyries, he is immediately there in your hand to be added back to your crew on your next turn.
In closing, if it weren’t apparent from my review and my closing thoughts, I think you’re wrong about this game and, judging from your comment, I think you may have been playing it incorrectly – much to your detriment. If so, I hope that you’ll give the game another try using the correct rules. I’m sure you’ll have much better time.