Have you ever looked at a table full of miniatures and wished you could add a splash of color but thought you didn’t have the skill, time, or money to invest in learning to paint miniatures? While, some people spend years and thousands of dollars perfecting the craft, taking the leap into painting does not have to be a daunting task. With a few basic techniques, you can be underway with minimal skill and investment.
In this article, we’ll take a look at washing and drybrushing, two of the most effective techniques for achieving an interesting paint job with minimal skill and materials required. The simple application of these techniques may not win you any awards, but they are a great way to add a splash of life to your table.

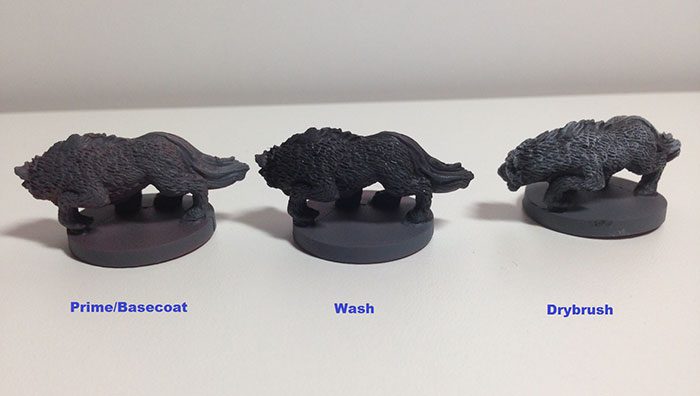
Step 1: Prime
Paint does not naturally stick to smooth plastic surfaces. Without something to grab onto, it will bead and smear. There are several brands of specialty primer on the market, but the basic spray primer available at most big-box hardware and craft stores will do the trick. A can of primer costs about $5 and is good for a few dozen miniatures.
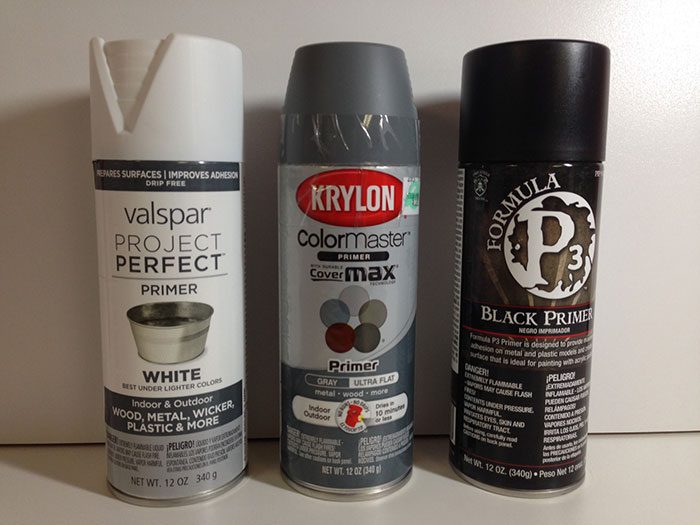
Basic spray primer is generally available in black, white, or grey. While any color of primer will work, the color you choose may impact the overall darkness/lightness of your final product. Apply a light coat of primer to your miniature and let it dry for at least an hour. You don’t need 100% coverage, just enough to give the paint something to grab.

Step 2. Basecoat
When selecting paints for a project, a good approach is to select both dark and light shades of each color you want to use. Alternatively, you can select a medium shade of each color and mix with white or black as needed. Specialty miniatures paint costs between $3 and $5 per bottle and generally comes in relatively small bottles (between 0.3 and 0.6 oz.). If that price sounds too steep, then the acrylic craft paint available at most big-box craft stores is a suitable alternative. Craft paint costs between $0.79 and $3 per bottle and comes in much larger bottles (usually 3 oz.).
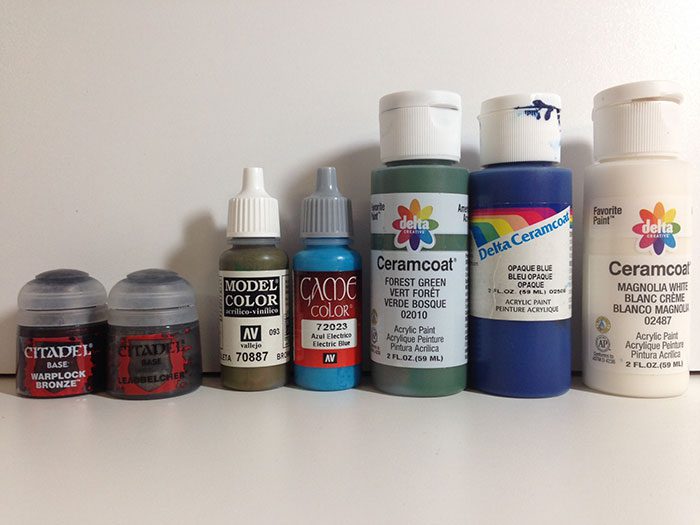
Once your primer is dry, apply a “basecoat” to the entire miniature, using the dark or medium shades of paint you selected.
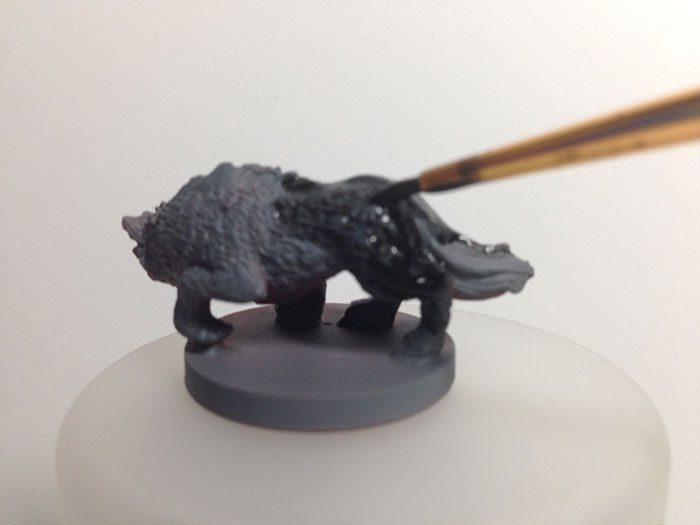
Step 3. Wash (optional)
“Wash” is a term of art in miniatures painting that refers to the technique of applying a substance to a miniature (usually ink or diluted paint), which sinks into the recesses of the miniature and creates an interesting shadow effect. Applying a wash to your miniatures is not strictly necessary if you don’t want to spend the money on specialty materials, but it is a great way to add contrast without much effort. Citadel Shade and Army Painter Quickshade are two of the most popular options.
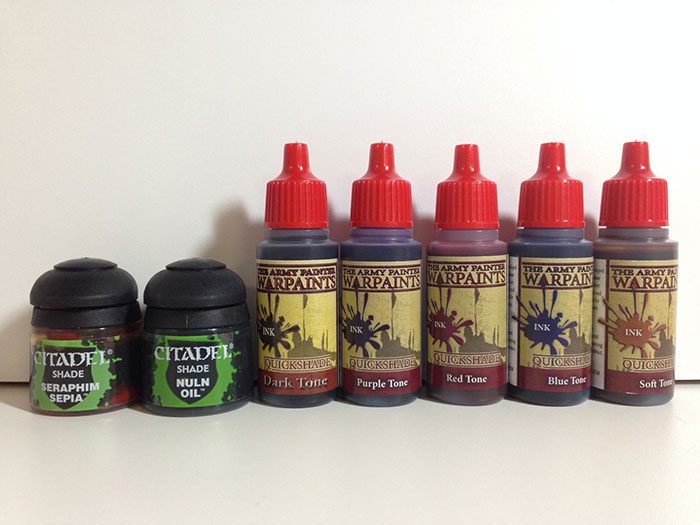
Once your basecoat dries, dip a clean brush in the wash medium and apply liberally to the miniature. You don’t want to apply so much that the wash medium pools or drips off, but don’t be afraid to get the miniature wet; the wash medium will dry much thinner than it goes on.
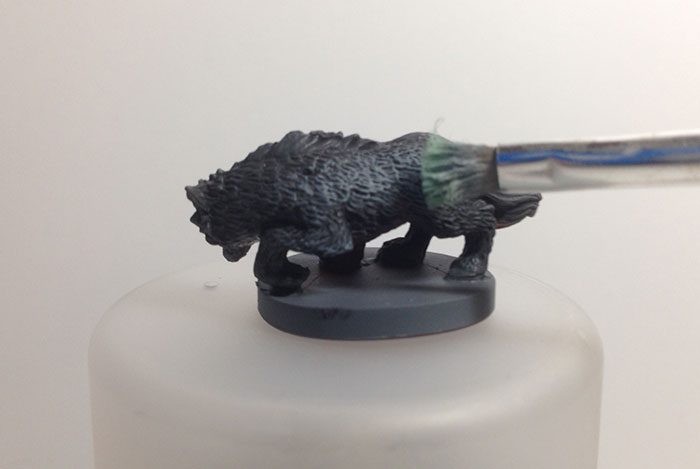
Step 4. Drybrush
Drybrushing is a technique where you dip a brush in paint, wipe all of the paint off, and then apply highlights to the miniature using the trace amounts of paint that remain on the brush. Take a lighter shade of the color you used to basecoat (in this example I just added a little white to the grey I used to basecoat) and an old or inexpensive brush *that is completely dry*. Coat the bristles of the brush in paint and then wipe the brush on a paper towel until almost all of the paint is gone.

If there is too much paint on the brush, it will simply repaint the whole surface of the miniature, so err on the side of wiping too much paint off. You can always add more if needed. Lightly run the brush across the texture of the miniature. Anywhere it hits resistance, the brush will leave trace amounts of paint, giving the miniature a natural-looking contrast.
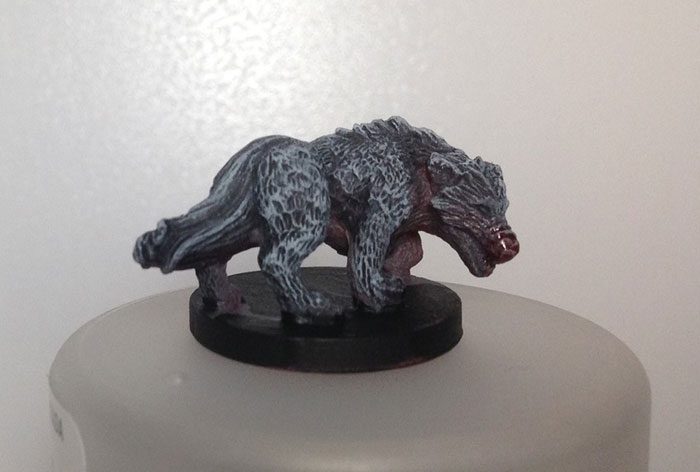
Step 5. Paint the base (optional)
If desired, paint the base of the miniature to obscure any accidental smudges. You may also wish to add detail (eyes, teeth, blood, etc.). If your miniatures will see a lot of play, a clear spray lacquer such as Testors Dullcote will protect your paint job for years to come. Otherwise, you’re done! Let everything dry overnight and have fun gaming.
—
What do you think about 5 Steps to Great Looking Miniatures? Give us your opinions in the comments below!